Using rclone to Sync Data to the Cloud

I am working hard to digitize my life. Last year I moved for the first time in 24 years and I realized I have way too much stuff. A lot of that stuff was paper, in the form of books and files, so I’ve been busy trying to get digital copies of all of it. Also, a lot of my my life was already digital. I have e-mails starting in 1998 and a lot of my pictures were taken with a digital camera.

TL;DR; This is a tutorial for using the open source rclone command line tool to securely synchronize files to a cloud storage provider, in this case Backblaze. It is based on MacOS but should work in a similar fashion on other operating systems.

That brings up the issue of backups. A friend of mine was the victim of a home robbery, and while they took a number of expensive things the most expensive was his archive of photos. It was irreplaceable. This has made me paranoid about backing up my data. I have about 500GB of must save data and around 7TB of “would be nice” to save data.

At my old house the best option I had for network access was DSL. It was usable for downstream but upstream was limited to about 640kbps. At that rate I might be able to backup my data – once.

I can remember in college we were given a test question about moving a large amount of data across the United States. The best answer was to put a physical drive in a FedEx box and overnight it there. So in that vein my backup strategy was to buy three Western Digital MyBooks. I created a script to rsync my data to the external drives. One I kept in a fire safe at the house. It wasn’t guaranteed to survive a hot fire in there (paper requires a much higher temperature to burn) but there was always a chance it might depending on where the fire was hottest. I took the other two drives and stored one at my father’s house and the other at a friend’s house. Periodically I’d take out the drive from the safe, rsync it, and switch it with one of the remote drives. I’d then rsync that drive and put it back in the safe.

It didn’t keep my data perfectly current, but it would mitigate any major loss.

At my new house I have gigabit fiber. It has synchronous upload and download speeds so my ability to upload data is much, much better. I figured it was time to choose a cloud storage provider and set up a much more robust way of backing up my data.

I should stress that when I use the term “backup” I really mean “sync”. I run MacOS and I use the built-in Time Machine app for backups. The term “backup” in this case means keeping multiple copies of files, so not only is your data safe, if you happen to screw up a file you can go back and get a previous version.

Since my offsite “backup” strategy is just about dealing with a catastrophic data loss, I don’t care about multiple versions of files. I’m happy just having the latest one available in case I need to retrieve it. So it is more of synchronizing my current data with the remote copy.

The first thing I had to do was choose a cloud storage provider. Now as my three readers already know I am not a smart person, but I surround myself with people who are. I asked around and several people recommended Backblaze, so I decided to start out with that service.

Now I am also a little paranoid about privacy, so anything I send to the cloud I want to be encrypted. Furthermore, I want to be in control of the encryption keys. Backblaze can encrypt your data but they help you manage the keys, and while I think that is fine for many people it isn’t for me.

I went in search of a solution that both supported Backblaze and contained strong encryption. I have a Synology NAS which contains an application called “Cloud Sync” and while that did both things I wasn’t happy that while the body of the file was encrypted, the file names were not. If someone came across a file called WhereIBuriedTheMoney.txt it could raise some eyebrows and bring unwanted attention. (grin)

Open source to the rescue. In trying to find a solution I came across rclone, an MIT licensed command-line tool that lets you copy and sync data to a large number of cloud providers, including Backblaze. Furthermore, it is installable on MacOS using the very awesome Homebrew project, so getting it on my Mac was as easy as

$ brew install rclone

However, like most open source tools, free software does not mean free solution, so I did have a small learning curve to climb. I wanted to share what I learned in case others find it useful.

Once rclone is installed it needs to be configured. Run

$ rclone config

to access a script to help with that. In rclone syntax a cloud provider, or a particular bucket at a cloud provider, is called a “remote”. When you run the configurator for the first time you’ll get the following menu:

No remotes found, make a new one?
n) New remote
s) Set configuration password
q) Quit config
n/s/q> n

Select “n” to set up a new remote, and it will ask you to name it. Choose something descriptive but keep in mind you will use this on the command line so you may want to choose something that isn’t very long.

Enter name for new remote.
name> BBBackup

The next option in the configurator will ask you to choose your cloud storage provider. Many are specific commercial providers, such as Backblaze B2, Amazon S3, and Proton Drive, but some are generic, such as Samba (SMB) and WebDav.

Option Storage.
Type of storage to configure.
Choose a number from below, or type in your own value.
 1 / 1Fichier
   \ (fichier)
 2 / Akamai NetStorage
   \ (netstorage)
 3 / Alias for an existing remote
   \ (alias)
 4 / Amazon Drive
   \ (amazon cloud drive)
 5 / Amazon S3 Compliant Storage Providers including AWS, Alibaba, ArvanCloud, Ceph, ChinaMobile, Cloudflare, DigitalOcean, Dreamhost, GCS, HuaweiOBS, IBMCOS, IDrive, IONOS, LyveCloud, Leviia, Liara, Linode, Minio, Netease, Petabox, RackCorp, Rclone, Scaleway, SeaweedFS, StackPath, Storj, Synology, TencentCOS, Wasabi, Qiniu and others
   \ (s3)
 6 / Backblaze B2
   \ (b2)

...

I chose “6” for Backblaze.

At this point in time you’ll need to set up the storage on the provider side, and then access it using an application key.

Log in to your Backblaze account. If you want to try it out note that you don’t need any kind of credit card to get started. They will limit you to 10GB (and I don’t know how long it stays around) but if you want to play with it before deciding just remember you can.

Go to Buckets in the menu and click on Create a Bucket
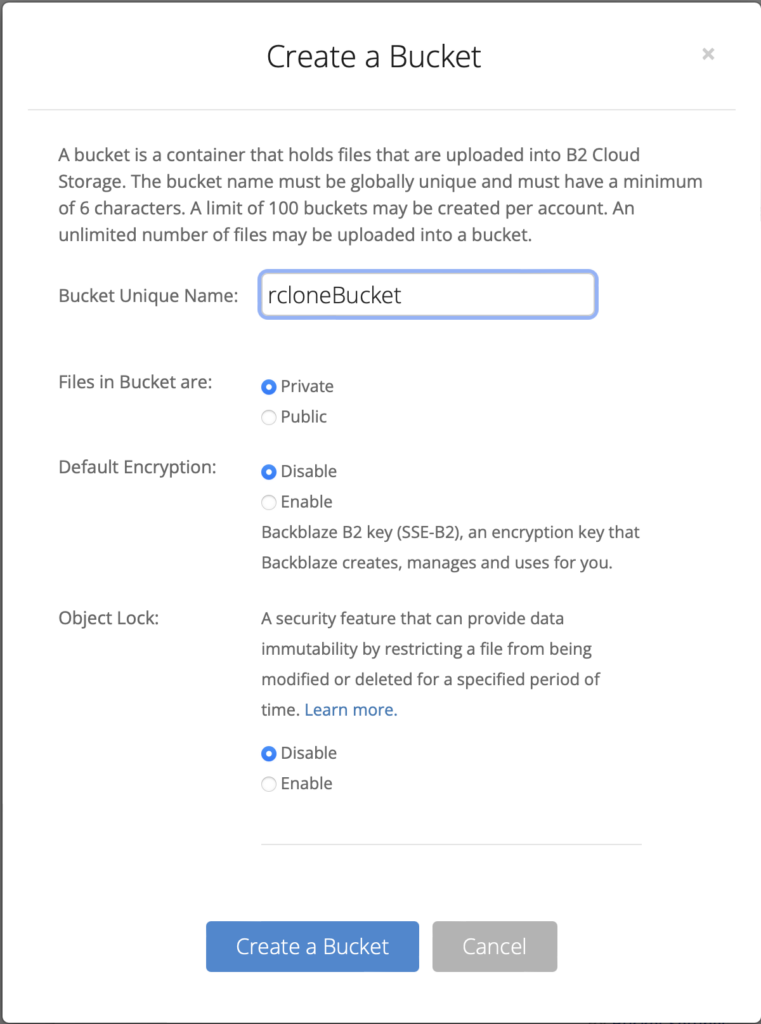
Note that you can choose to have Backblaze encrypt your data, but since I’m going to do that with rclone I left it disabled.

Once you have your bucket you need to create an application key. Click on Application Keys in the menu and choose Add a New Application Key.
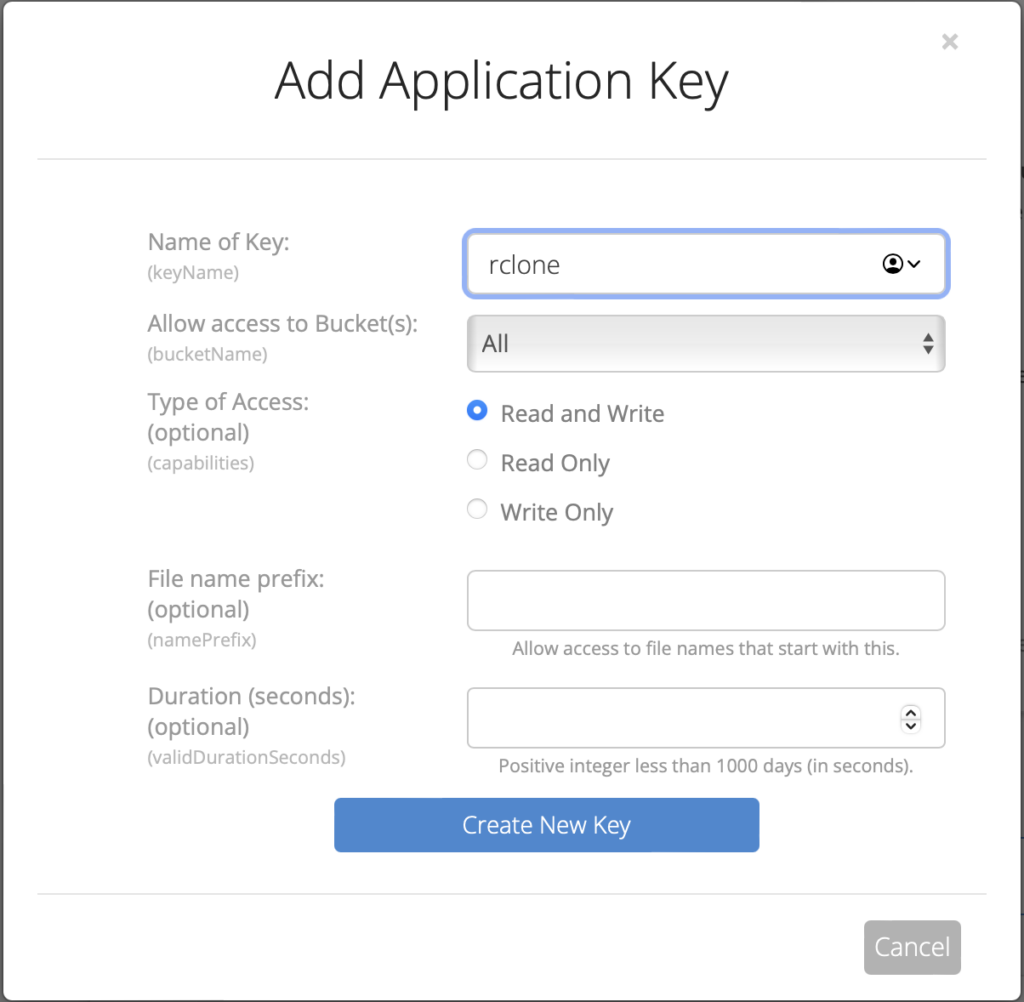
Now one annoying issue with Backblaze is that all buckets have to be unique in the entire system, so “rcloneBucket” and “Media1” etc have already been taken. Since I’m just using this as an example it was fine for the screenshot, but note that when I add an application key I usually limit it to a particular bucket. When you click on the dropdown it will list available buckets.

Once you create a new key, Backblaze will display the keyID, the keyName and the applicationKey values on the screen. Copy them somewhere safe because you won’t be able to get them back. If you lose them you can always create a new key, but you can’t modify a key once it has been created.

Now with your new keyID, return to the rclone configuration:

Option account.
Account ID or Application Key ID.
Enter a value.
account> xxxxxxxxxxxxxxxxxxxxxxxx

Option key.
Application Key.
Enter a value.
key> xxxxxxxxxxxxxxxxxxxxxxxxxx

This will allow rclone to connect to the remote cloud storage. Finally, rclone will ask you a couple of questions. I just choose the defaults:

Option hard_delete.
Permanently delete files on remote removal, otherwise hide files.
Enter a boolean value (true or false). Press Enter for the default (false).
hard_delete>

Edit advanced config?
y) Yes
n) No (default)
y/n>

The one last step is to confirm your remote configuration. Note that you can always go back and change it if you want, later.

Configuration complete.
Options:
- type: b2
- account: xxxxxxxxxxxxxxxxxxxxxx
- key: xxxxxxxxxxxxxxxxxxxxxxxxxx
Keep this "BBBackup" remote?
y) Yes this is OK (default)
e) Edit this remote
d) Delete this remote
y/e/d> y

Current remotes:

Name                 Type
====                 ====
BBBackup             b2

e) Edit existing remote
n) New remote
d) Delete remote
r) Rename remote
c) Copy remote
s) Set configuration password
q) Quit config
e/n/d/r/c/s/q> q

At this point in time, quit out of the configurator for a moment.

You may have realized that we have done nothing with respect to encryption. That is because we need to add a wrapper service around our Backblaze remote to make this work (this is that there learning curve thing I mentioned earlier).

While I don’t know if this is true or not, it was recommended that you not put encrypted files in the root of your bucket. I can’t really see why it would hurt, but just in case we should put a folder in the bucket at which we can then point the encrypted remote. With Backblaze you can use the webUI or you can just use rclone. I recommend the latter since it is a good test to make sure everything is working. On the command line type:

$ rclone mkdir BBBackup:rcloneBackup/Backup

2024/01/23 14:13:25 NOTICE: B2 bucket rcloneBackup path Backup: Warning: running mkdir on a remote which can't have empty directories does nothing

To test that it worked you can look at the WebUI and click on Browse Files, or you can test it from the command line as well:

$ rclone lsf BBBackup:rcloneBackup/
Backup/

Another little annoying thing about Backblaze is that the File Browser in the webUI isn’t in real time, so if you do choose that method note that it may take several minutes for the directory (and later any files you send) to show up.

Okay, now we just have one more step. We have to create the encrypted remote, so go back into the configurator:

$ rclone config

Current remotes:

Name                 Type
====                 ====
BBBackup             b2

e) Edit existing remote
n) New remote
d) Delete remote
r) Rename remote
c) Copy remote
s) Set configuration password
q) Quit config
e/n/d/r/c/s/q> n

Enter name for new remote.
name> crypt

Just like last time, chose a name that you will be comfortable typing on the command line. This is the main remote you will be using with rclone from here on out. Next we have to choose the storage type:

Option Storage.
Type of storage to configure.
Choose a number from below, or type in your own value.
 1 / 1Fichier
   \ (fichier)
 2 / Akamai NetStorage
   \ (netstorage)

...

14 / Encrypt/Decrypt a remote
   \ (crypt)
15 / Enterprise File Fabric
   \ (filefabric)
16 / FTP
   \ (ftp)
17 / Google Cloud Storage (this is not Google Drive)
   \ (google cloud storage)
18 / Google Drive
   \ (drive)

...

Storage> crypt

You can type the number (currently 14) or just type “crypt” to choose this storage type. Next we have to point this new remote at the first one we created:

Option remote.
Remote to encrypt/decrypt.
Normally should contain a ':' and a path, e.g. "myremote:path/to/dir",
"myremote:bucket" or maybe "myremote:" (not recommended).
Enter a value.
remote> BBBackup:rcloneBackup/Backup

Note that it contains the name of the remote (BBBackup), the name of the bucket (rcloneBackup), and the name of the directory we created (Backup). Now for the fun part:

Option filename_encryption.
How to encrypt the filenames.
Choose a number from below, or type in your own string value.
Press Enter for the default (standard).
   / Encrypt the filenames.
 1 | See the docs for the details.
   \ (standard)
 2 / Very simple filename obfuscation.
   \ (obfuscate)
   / Don't encrypt the file names.
 3 | Adds a ".bin", or "suffix" extension only.
   \ (off)
filename_encryption>

This is the bit where you get to solve the filename problem I mentioned above. I always choose the default, which is “standard”. Next you get to encrypt the directory names as well:

Option directory_name_encryption.
Option to either encrypt directory names or leave them intact.
NB If filename_encryption is "off" then this option will do nothing.
Choose a number from below, or type in your own boolean value (true or false).
Press Enter for the default (true).
 1 / Encrypt directory names.
   \ (true)
 2 / Don't encrypt directory names, leave them intact.
   \ (false)
directory_name_encryption>

I choose the default of “true” here as well. Look, I don’t expect to ever become the subject of an in-depth digital forensics investigation, but the less information out there the better. Should Backblaze ever get a subpoena to let someone browse through my files on their system, I want to minimize what they can find.

Finally, we have to choose a passphrase:

Option password.
Password or pass phrase for encryption.
Choose an alternative below.
y) Yes, type in my own password
g) Generate random password
y/g> y
Enter the password:
password:
Confirm the password:
password:

Option password2.
Password or pass phrase for salt.
Optional but recommended.
Should be different to the previous password.
Choose an alternative below. Press Enter for the default (n).
y) Yes, type in my own password
g) Generate random password
n) No, leave this optional password blank (default)
y/g/n>

Now, unlike your application key ID and password, these passwords you need to remember. If you loose them then you will not be able to get access to your data. I did not choose a salt password but it does appear to be recommended. Now we are almost done:

Edit advanced config?
y) Yes
n) No (default)
y/n>

Configuration complete.
Options:
- type: crypt
- remote: BBBackup:rcloneBackup/Backup
- password: *** ENCRYPTED ***
Keep this "cryptMedia" remote?
y) Yes this is OK (default)
e) Edit this remote
d) Delete this remote
y/e/d> y

Now your remote is ready to use. Note that when using a remote with encrypted files and directories do not use the Backblaze webUI to create folders underneath your root or rclone won’t recognize them.

I bring this up because there is one frustrating thing with rclone. If I want to copy a directory to the cloud storage remote it copies the contents of the directory and not the directory itself. For example, if I type on the command line:

$ cp -r Music /Media

it will create a “Music” directory under the “Media” directory. But if I type:

$ rclone copy Music crypt:Media

it will copy the contents of the Music directory into the root of the Media directory. To get the outcome I want I need to run:

$ rclone mkdir crypt:Media/Music

$ rclone copy Music crypt:Media/Music

Make sense?

While rclone has a lot of commands, the ones I have used are “mkdir” and “rmdir” (just like on a regular command line) and “copy” and “sync”. I use “copy” for the initial transfer and then “sync” for subsequent updates.

Now all I have to do for cloud synchronization is set up a crontab to run these commands on occasion (I set mine up for once a day).

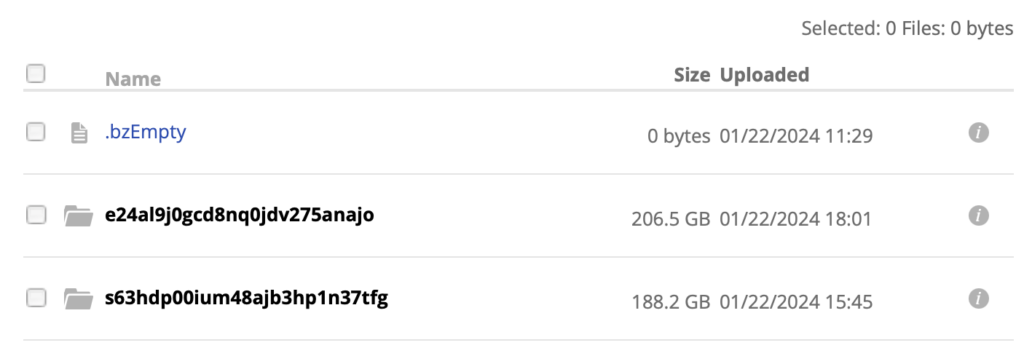
I can check that the encryption is working by using the Backblaze webUI. First I see the folder I created to hold my encrypted files:

But the directories in that folder have names that sound like I’m trying to summon Cthulhu:
As you can see from this graph, I was real eager to upload stuff when I got this working:
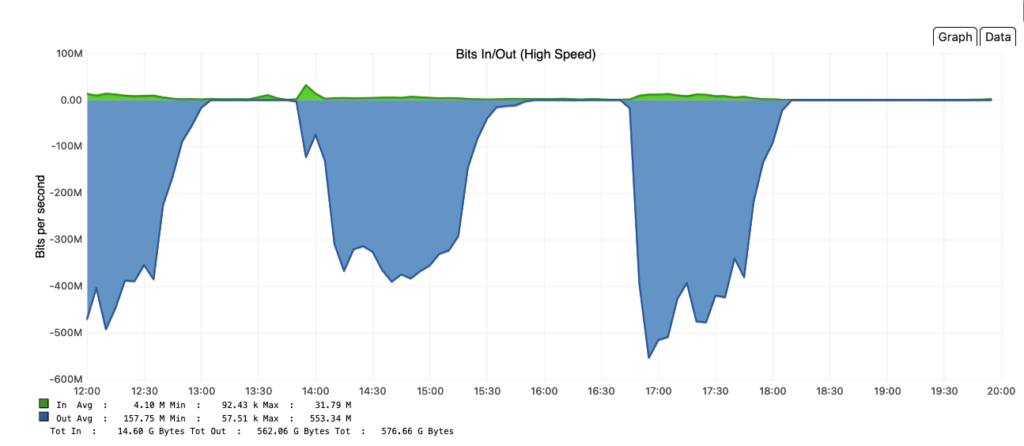
and on the first day I sent up nearly 400GB of files. Backblaze B2 pricing is currently $6/TB/month, and this seems about right:

I have since doubled my storage so it should run about 20 cents a day. Note that downloading your data is free up to three times the amount of data stored. In other words, you could download all of the data you have in B2 three times in a given month and not incur fees. Since I am using this simply for catastrophic data recovery I shouldn’t have to worry about egress fees.

I am absolutely delighted to have this working and extremely impressed with rclone. For my needs open source once again outshines commercial offerings. And remember if you have other preferences for cloud storage providers you have a large range of choices, and the installation should be similar to the one I did here.
2023 Percona Live – Day 2

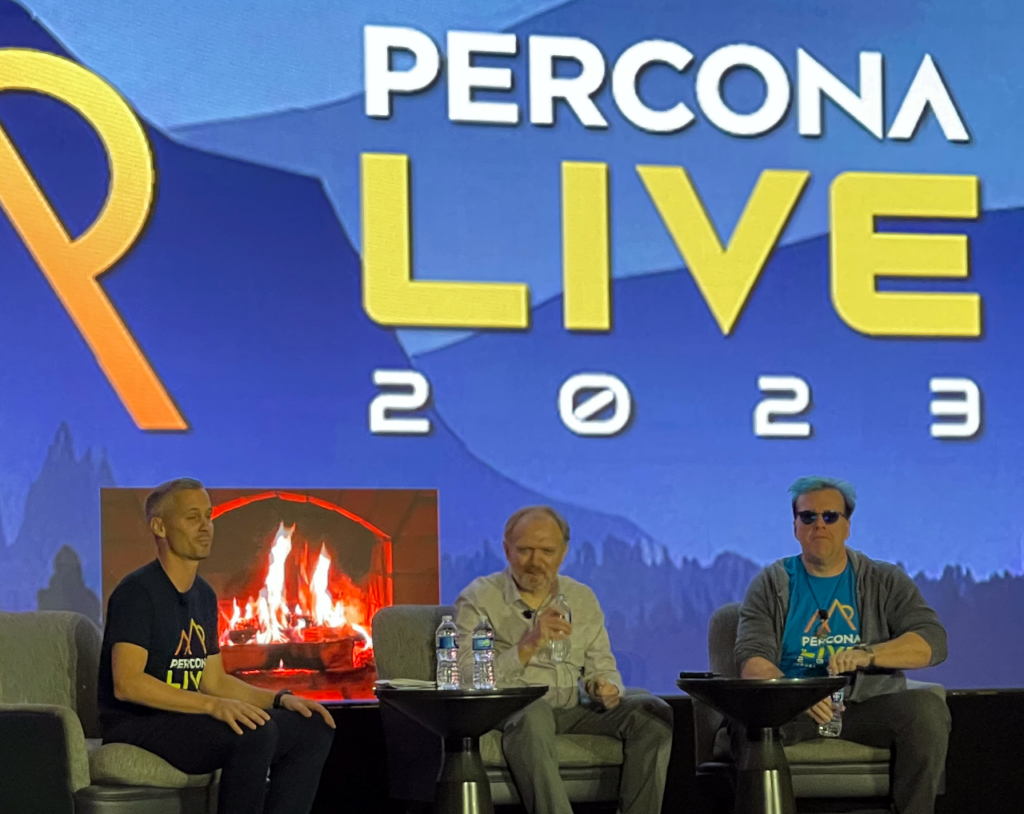
The final day of Percona Live started off with a keynote and a panel discussion.

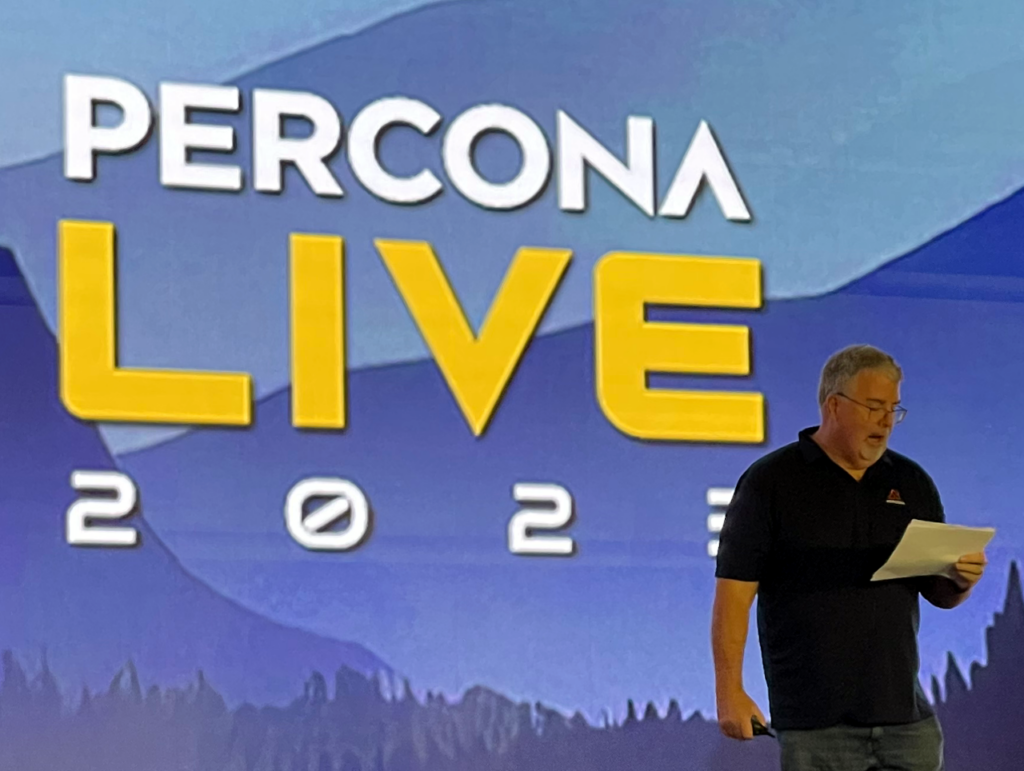
As on the day before, Dave Stokes starting things off with some housekeeping notes.

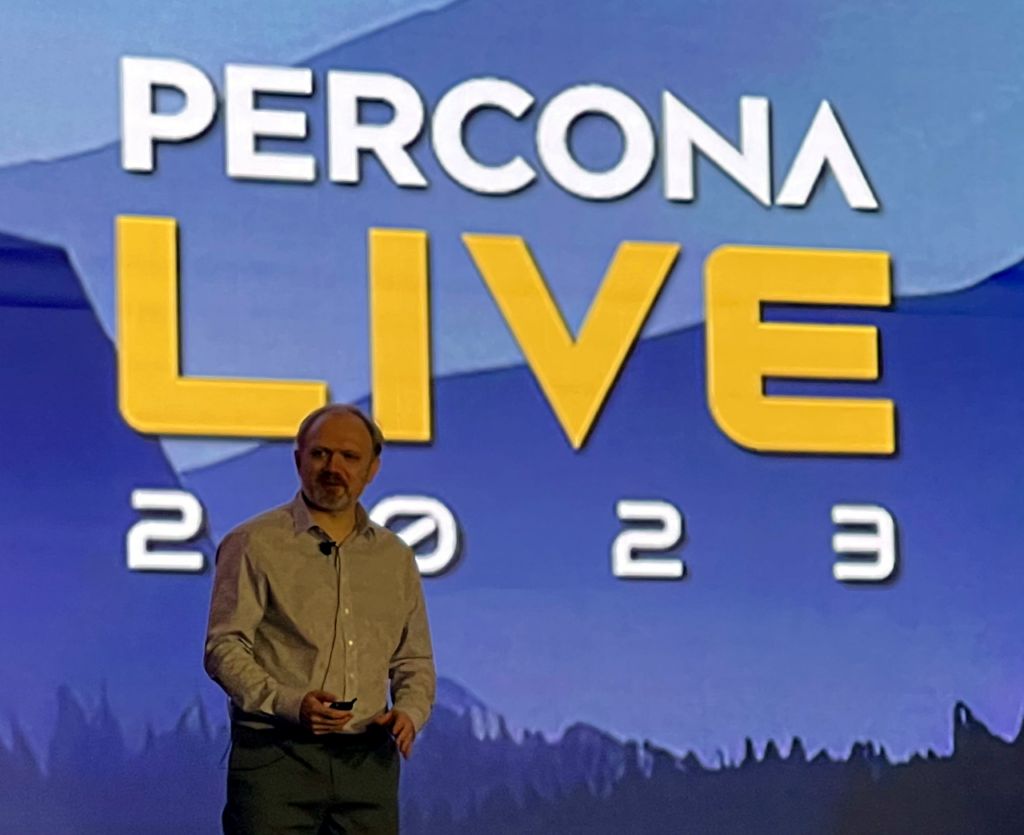
After that he introduced Percona’s Chief Technical Officer and co-Founder, Vadim Tkachenko, who presented a roadmap for Percona’s products.

I am always interested in the customer angle for any product, so after Vadim finished he joined Michael Coburn, Principal Architect at Percona and Ernie Souhrada, who is a database engineer from Pinterest, for a “fireside chat”. Any discussion of a technical solution can be enriched by talking to end users, and Souhrada, as you might expect, was very bullish on Percona but was also able to tell us about some issues they encountered and how they were resolved.

After this opening presentation I spent my time in the sponsor showcase and talked to a number of people. While this conference is pretty specialized, people were enjoying it and seemed to be getting a lot out of the sessions.

In the afternoon I went to a second session by AWS, this one focused on troubleshooting issues with MySQL on Amazon RDS.

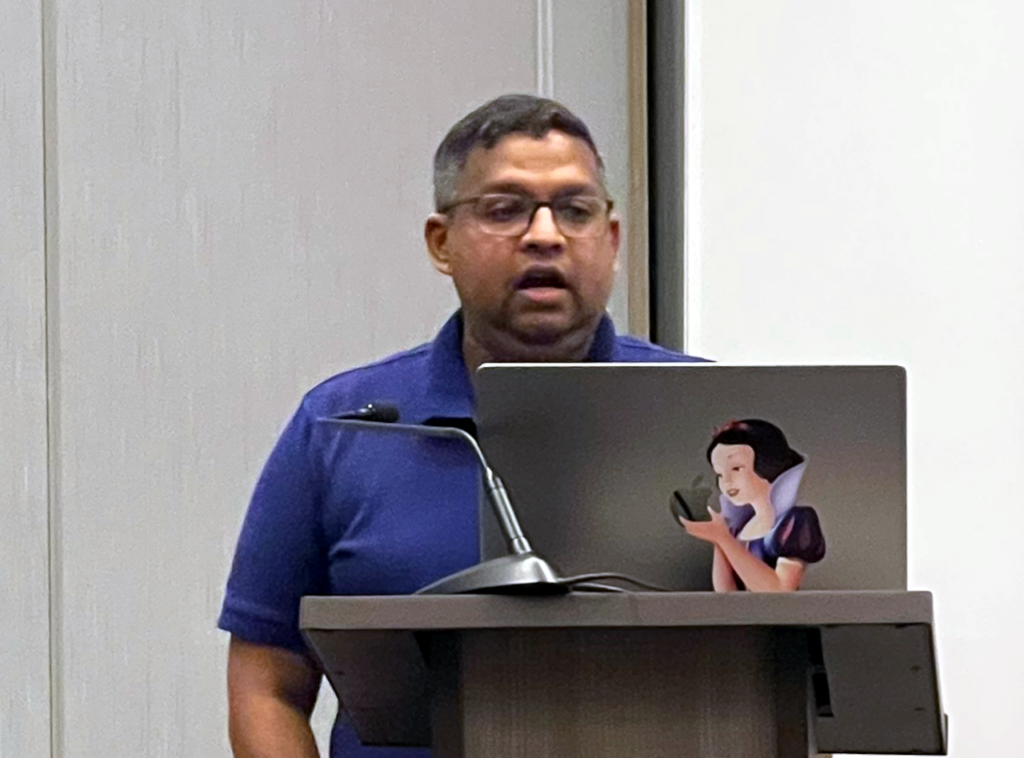
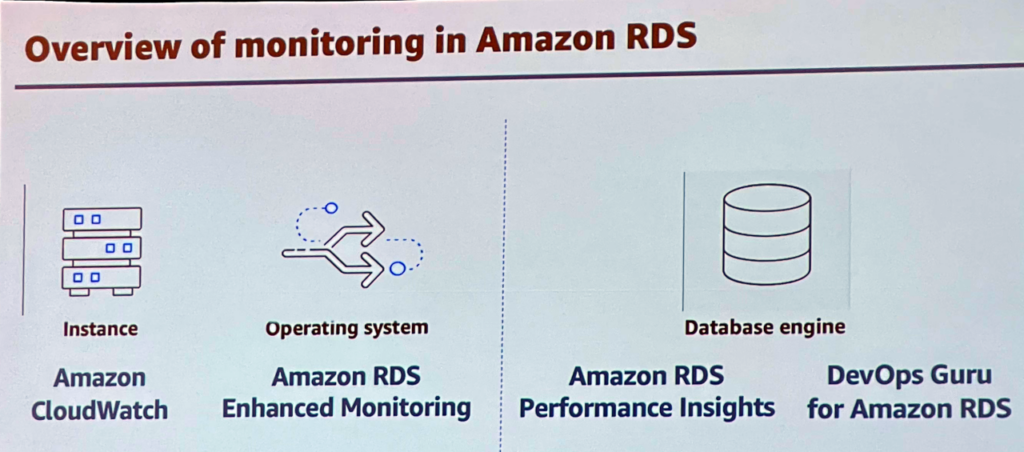
Jignesh Shah kicked it off by discussing some of the monitoring tools one gets with Amazon RDS, which include gathering metrics on the instance, the operating system and, of course, the database.

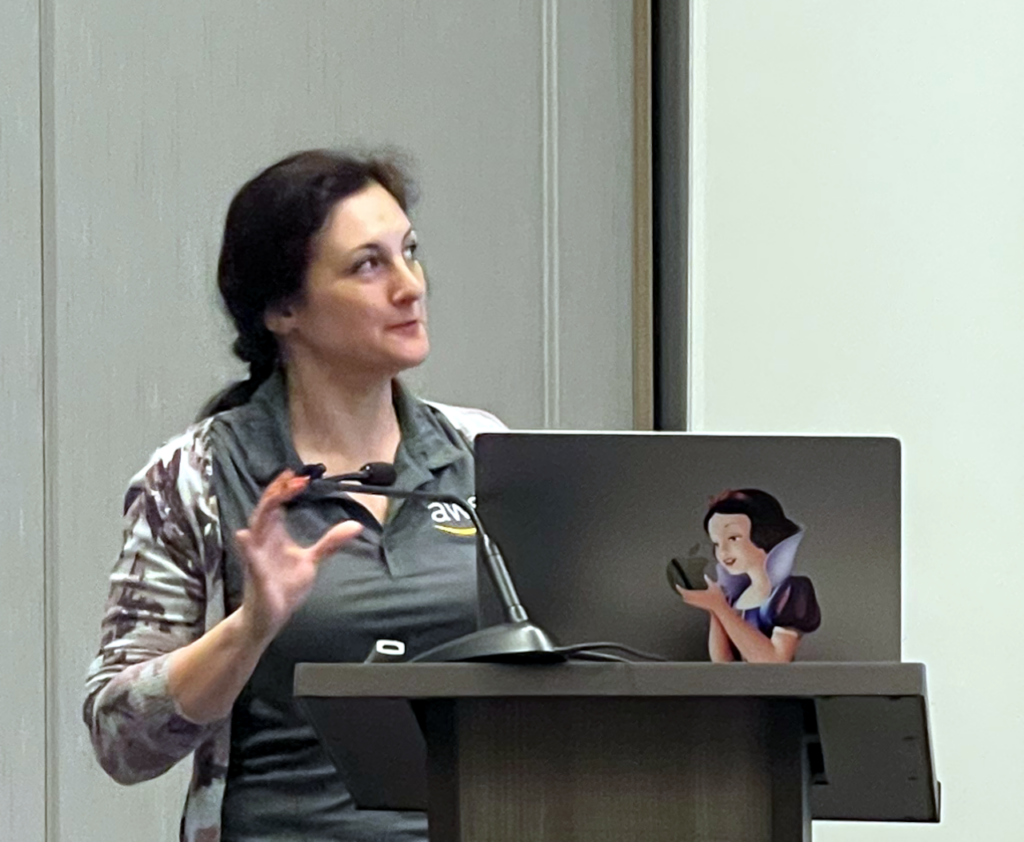
He then turned it over to Raluca Constantin, a database engineer who really knows her stuff.

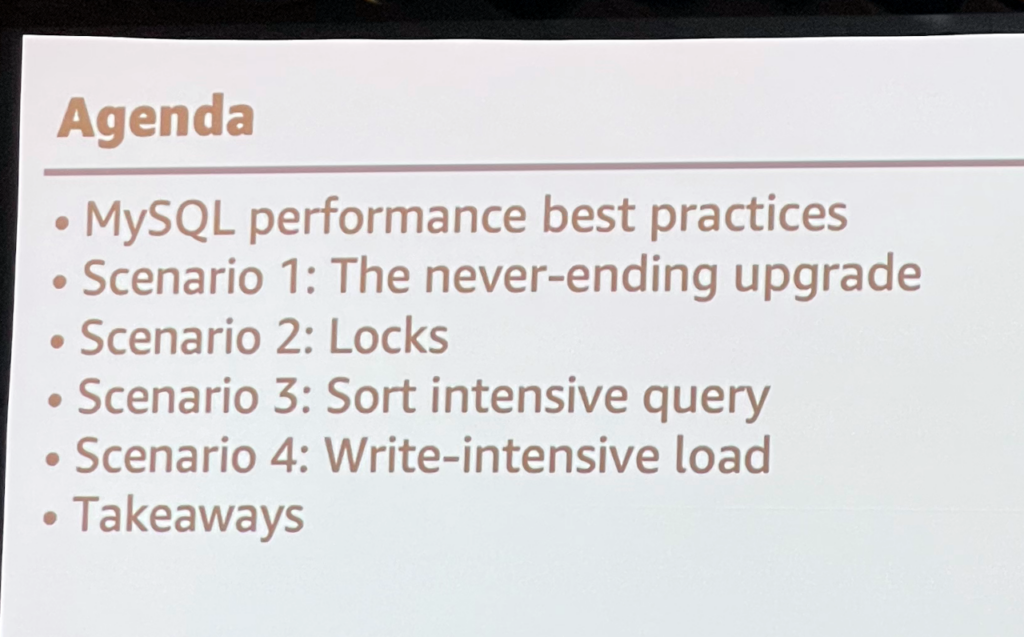
She went over four different scenarios that she had encountered in the past with MySQL along with step by step instructions on how they were corrected.

The first scenario involved a problem with upgrading from MySQL 5.7 to MySQL 8. In some cases the table names for some system tables would have case differences. This would cause upgrades to hang.

The easiest fix was to run a query before the upgrade to see if these changes existed and if so the table names could be modified in the existing database to make sure the upgrade didn’t fail. However, the first attempt took over nine minutes to complete, and Raluca went through the logic of improving the query until it ran in seconds.

The second scenario involved detecting locks. Locks occur when the database is executing an action that requires exclusive access to, say, a table. If that action takes a long time, performance of the database can degrade. There are tools, such as Percona Monitoring and Management (PMM), that can detect when this happens, and she also showed how one can modify some system parameters so that actions that cause locks will fail if they exceed a specified timeout.

At this point I had to leave to meet some other AWS folks across town, which was disappointing since I really liked how Raluca was presenting these topics. I hope to be able to see her speak again in the near future.

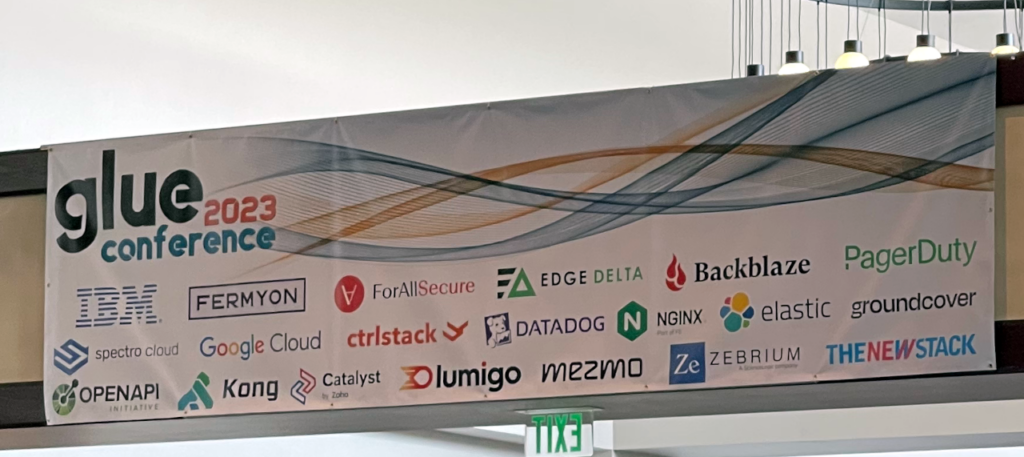
While this was pretty much the end of my Percona Live experience, I did discover that there was another conference going on this week called Glue.

I was pretty certain I saw Matt Butcher from Fermyon in the hotel, but didn’t want to bother him. Fermyon’s technology is a topic for a future post.

By the time I got back to the Marriott later that night, all of the conference stuff had been cleaned up. Overall I was pretty pleased with the venue with the exception that it is in a generic business park and really didn’t show off what Denver has to offer.

It was a pretty intense week (and I had to get up early for my flight home) so I went to bed, but I’m happy I came. I got to see some friends and make some new ones, which is one of the best things about in-person conferences. That said I’m looking forward to being at home for a bit.

SCaLE 20x – Day 1

I spent Friday morning practicing and working on my presentation, but managed to make it over to the conference just before lunch.

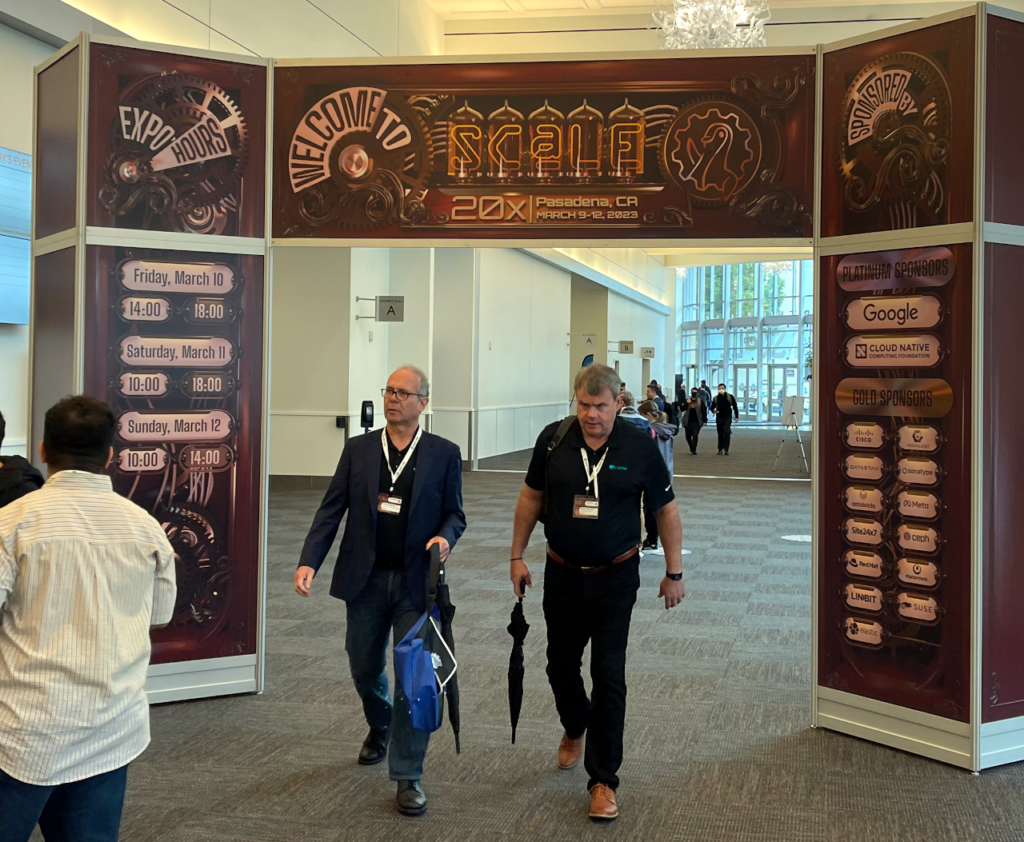
SCaLE 20x Sign

I was really impressed with the “steampunk” graphics for this year’s show. They were cool.

Check-in, as usual with SCaLE, was a breeze. They have automated most of it. You walk up to a bank of computers, choose one and then enter in your registration information and your badge gets printed. I also think you could purchase a registration through the system as well.

Then you walk down to a table to get your conference bag, badge holder and lanyard.

After wandering around for a bit I went down the street to meet up with Aaron Leung. While I love many things about being able to work remotely, I do miss meeting people in person and especially people I work with at AWS. Aaron happens to live in LA and he was kind enough to come out to see me and we had a great lunch.

Having SCaLE back in Pasadena was awesome. Not only is the convention center nice, it is really close to a ton of restaurants so you have a bunch of options for dining. The only downside was that it was raining (you can see the folks with the umbrellas above). When I had to go outside it wasn’t bad – more of a mist – and it was strange to have rain in LA. It did make the hills very green, however, and quite the departure from the usual tan.

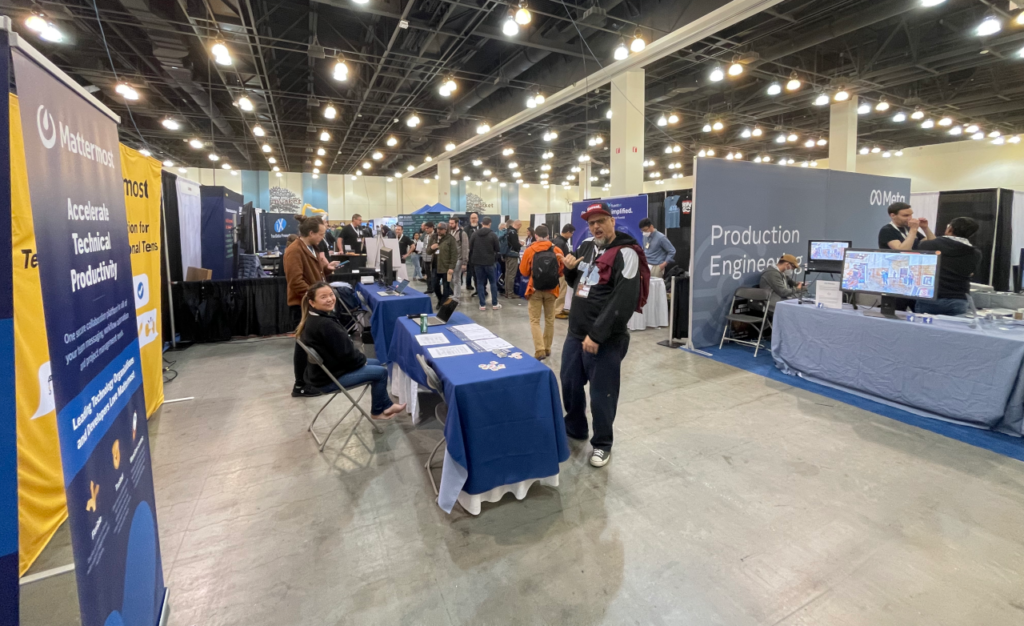
After our long lunch I worked some more on my presentation, and then headed back over to the conference. The Expo floor was open so I spent some time wandering around and looking at the booths.

SCaLE Expo Floor

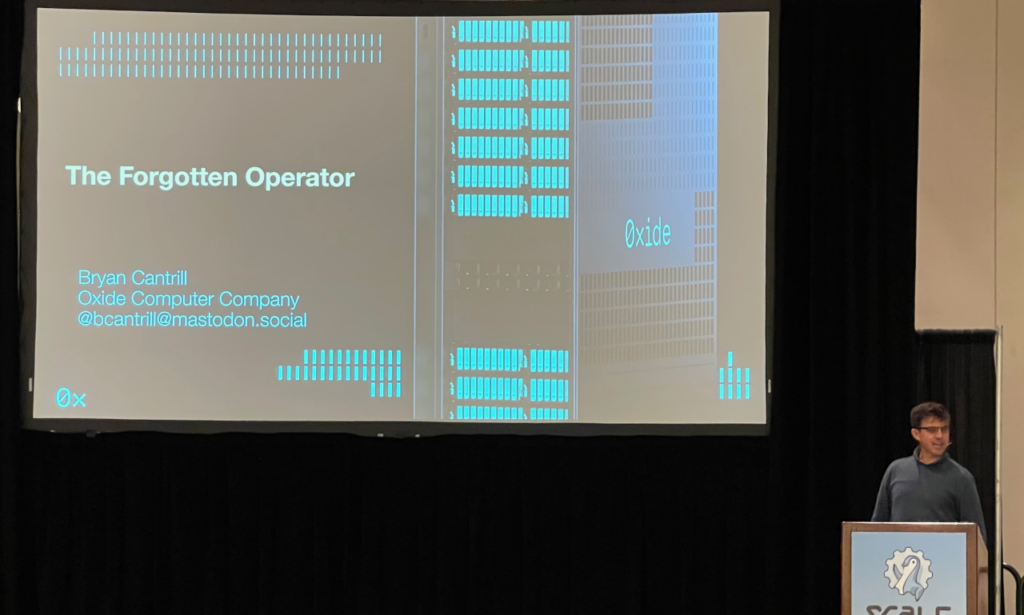
Toward the end of the afternoon I went to see Bryan Cantrill speak on his new company, Oxide Computer.

Bryan Cantrill and The Forgotten Operator

The “forgotten” operator in the title refers to people tasked with running on-premises data centers. Now I’ve been in a number of data centers and they were all has he described: racks upon racks of 1U and 2U servers arranged in rows, some with “hot” aisles and “cold” aisle and each server with a pair of power supplies and lots and lots of cabling.

I have never been inside a Google or Amazon data center, but I’ve always imagined it to be more along the lines of the one Javier Bardem’s character set up in Skyfall.

Picture of a data center from the James Bond film Skyfall.

In these days of the “cloud”, compute is divorced from storage and so a lot of the hardware in an old school 1U rack mount machine is unnecessary. Plus there is the antiquated idea of having separate power supplies for each board in the rack. Computers run on DC power, so why not just supply it directly from a central source vs. individually? I started my professional career working for phone companies and everything was DC (many central offices had a huge room in the basement with chemical batteries – and, yes, it did smell).

When I started my own company 20+ years ago I had two Supermicro 1U machines and when I turned them on they were each louder than a vacuum cleaner. Bryan told us that their racks are whisper-quiet (well, once they are powered on and the fans on the rectifiers spool down).

I’m oversimplifying, but that is the basic idea behind Oxide. They want to supply cloud-grade computing gear to enterprises and break the old paradigm of what a data center should look like. Users can still leverage cloud technologies like Kubernetes but on their own gear. It still doesn’t solve the need to have people who understand the technology on staff, but it was exciting in any case.

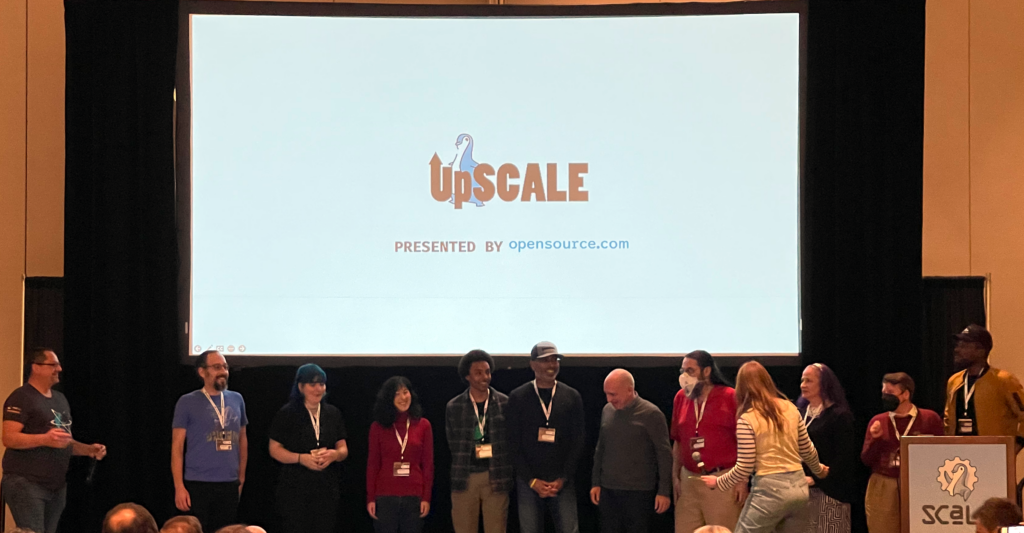
Friday evening featured a series of lightning talks called “Upscale”. It was hosted by Jason Hibbets and Hannah Anderson and sponsored by opensource.com.

Upscale Presenters and Participants

Lightning talks are 5 minute presentations consisting of a set number of slides that advance automatically. I’ve never given one, and once when I mentioned that I thought it was cool it was pointed out that I can’t introduce myself in five minutes, much less give a talk. (grin)


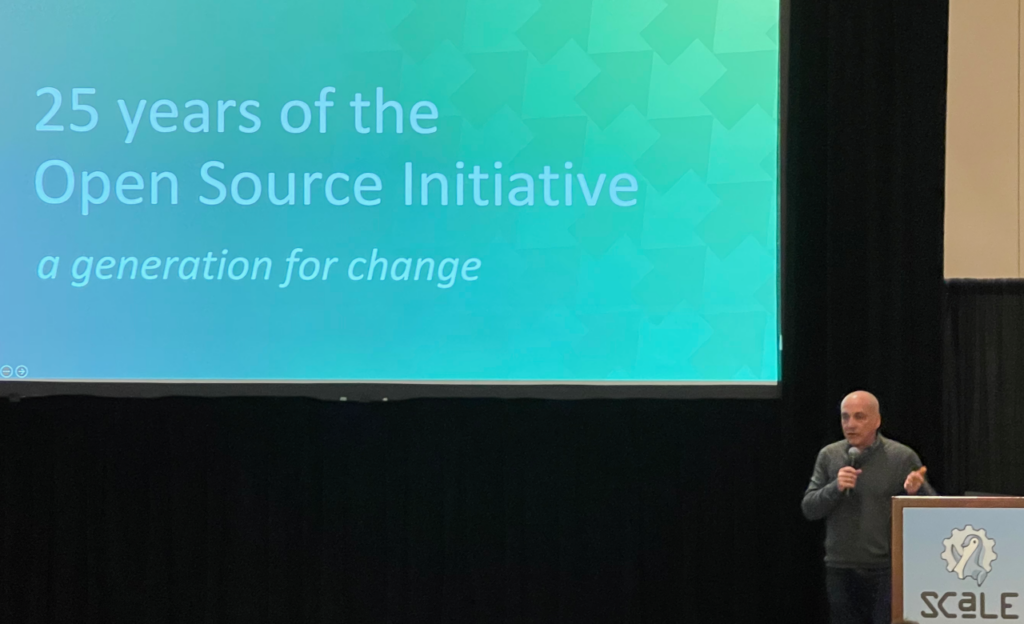
I was impressed with the presentations. One that stuck out was the fact that the term “open source” as formalized by the Open Source Initiative is now 25 years old. Wow.

After Upscale a group of us went down the street for dinner and drinks. I can’t emphasize enough about how much I miss the face-to-face aspect of in-person conferences and I hope we can continue to have them safely.

The Adventure Continues

Last year I wrote about parting ways with the OpenNMS Project and how I was ready for “Act III” of my professional career.

With my future being somewhat of a tabula rasa, I was a bit overwhelmed with choices, so I decided to return to my roots and dust off my consulting LLC. Soon I found myself in the financial sector helping to deploy network monitoring and observability solutions.

I was working with some pretty impressive applications and it was interesting to see the state of the art for monitoring. We’ve come a long way since SNMP. It was engaging and fun work, but all the software was proprietary and I missed the open source aspect.

Recently, Spot Callaway made me aware of an opportunity at Amazon Web Services for an open source evangelist position. Of all the things I’ve done in my career, acting as an evangelist for open source solutions was my favorite thing to do and here was a chance to do it full time. I will admit that Amazon was not the first name that popped into my head when I think “open source” but as I got to learn more about the team and AWS’s open source initiatives, the more interested I became in the position. After I made it through their rather intense interview process and met even more people with whom I’ll be working, it became a job I couldn’t refuse.

So I’m happy to announce that I’m now a Principal Evangelist at AWS, reporting to David Nalley, who, in addition to being a pretty awesome boss is also the current President of the Apache Software Foundation. OpenNMS would not have existed without software from the ASF, and it will be cool to learn, in addition, more about that organization first hand.

My main role will be to work with open source companies as an advocate for them within AWS. The solutions AWS provides can help jumpstart these companies toward profitability by providing the resources they need to be successful and to affordably grow as their needs change. While I am just getting started within the organization and it will take me some time to learn the ropes, I am hoping my own experience in running an open source business will provide a unique insight into issues faced by those companies.

Exciting times, so watch this space as my open source adventures continue.

Nineteen Years

Nineteen years ago my friend Ben talked me into starting this blog. I don’t update it as frequently any more for a variety of reasons, specifically because more people interact on social media these days and I’m not as involved in open source as I used to be, but it is still somewhat of an achievement to keep something going this long.

My “adventures” in open source started out on September 10th, 2001, when I started a new job with a company called Oculan to work on their open source monitoring platform OpenNMS. In May of 2002 I became the lead maintainer on the project, and by the time I started this blog I’d been at it for several months. Back then blogs were one of the main ways an open source project could communicate with its community.

The nearly two decades I spent with OpenNMS were definitely an adventure, and this site can serve as a record of both those successes and those struggles.

Nineteen years ago open source was very different than it is today. Today it is ubiquitous: I think it would be rare for a person to go a single day without interacting with open source software in some fashion. But back then there was still a lot of fear, uncertainty and doubt about using it, with a lot of confusion about what it meant. Most people didn’t take it seriously, often comparing it to “shareware” and never believing that it would ever be used for doing “real” things. On a side note, even in 2022 I recently had one person make the shareware comparison when I brought up Grafana, a project that has secured nearly US$300 million in funding.

Back then we were trying to figure out a business model for open source, and I think in many ways we still are. The main model was support and services.

You would have thought this would have been more successful than it turned out to be. Proprietary software costing hundred of thousands if not millions of dollars would often require that you purchase a maintenance or support contract running anywhere from 15% to 25% of the original software cost per year just to get updates and bug fixes. You would think that people would be willing to pay that amount or less for similar software, avoiding the huge upfront purchase, but that wasn’t the case. If they didn’t have to buy support they usually wouldn’t. Plus, support doesn’t easily scale. It is hard finding qualified people to support complex software. I’d often laugh when someone would contact me offering to double our sales because we wouldn’t have been able to handle the extra business.

One company, Red Hat, was able to pull it off and create a set of open source products people were willing to purchase at a scale that made them a multi-billion dollar organization, but I can’t think of another that was able to duplicate that success.

Luckily, the idea of “hosted” software gained popularity. One of my favorite open source projects is WordPress. You are reading this on a WordPress site, and the install was pretty easy. They talk about a “five minute” install and have done a lot to make the process simple.

However, if you aren’t up to running your own server, it might as well be a five year install process. Instead, you can go to “wordpress.com” and get a free website hosted by them and paid for by ads being shown on your site, or you can remove those ads for as little as US$4/month. One of the reasons that Grafana has been able to raise such large sums is that they, too, offer a hosted version. People are willing to pay for ease of use.

But by far the overwhelming use of open source today is as a development methodology, and the biggest open source projects tend to be those that enable other, often proprietary, applications. Two Sigma Ventures has an Open Source Index that tries to quantify the most popular open source projects, and at the moment these include Tensorflow (a machine learning framework), Kubernetes (a container orchestration platform) and of course the Linux kernel. What you don’t see are end user applications.

And that to me is a little sad. Two decades ago the terms “open source” and “free software” were often used interchangeably. After watching personal computers go from hobbyists to mainstream we also saw control of those systems move to large companies like Microsoft. The idea of free software, as in being able to take control of your technology, was extremely appealing. After watching companies spend hundreds of thousands of dollars on proprietary software and then being tied to those products, I was excited to bring an alternative that would put the power of that software back into the hands of the users. As my friend Jonathan put it, we were going to change the world.

The world did change, but not in the way we expected. The main reason is that free software really missed out on mobile computing. While desktop computers were open enough that independent software could be put on them, mobile handsets to this day are pretty locked down. While everyone points to Android as being open source, to be honest it isn’t very useful until you let Google run most of it. There was a time where almost every single piece of technology I used was open, including my phone, but I just ran out of time to keep up with it and I wanted something that just worked. Now I’m pretty firmly back into the Apple ecosystem and I’m amazed at what you can do with it, and I’m so used to just being able to get things going on the first try that I’m probably stuck forever (sigh).

I find it ironic that today’s biggest contributors to open source are also some of the biggest proprietary software companies in the world. Heck, even Red Hat is now completely owned by IBM. I’m not saying that this is necessarily a bad thing, look at all the open source software being created by nearly everyone, but it is a long way from the free software dream of twenty years ago. Even proprietary, enterprise software has started to leverage open APIs that at least give a nod to the idea of open source.

We won. Yay.

Recently some friends of mine attended a fancy, black-tie optional gala hosted by the Linux Foundation to celebrate the 30th anniversary of Linux. Most of them work for those large companies that heavily leverage open source. And while apparently a good time was had by all, I can’t help but think of, say, those developers who maintain projects like Log4j who, when there is a problem, get dumped on to fix it and probably never get invited to cool parties.

Open source is still looking for a business model. Heck, even making money providing hosted versions of your software is a risk if one of the big players decides to offer their version, as to this day it is still hard to compete with a Microsoft or an Amazon.

But this doesn’t mean I’ve given up on open source. Thanks to the Homebrew project I still use a lot of open source on my Macintosh. I’m writing this using WordPress on a server running Ubuntu through the Firefox browser. I still think there are adventures to be had, and when they happen I’ll write about them here.

Open Source Contributor Agreements

I noticed a recent uptick in activity on Twitter about open source Contributor License Agreements (CLAs), mostly negative.

Twitter Post About CLAs

The above comment is from a friend of mine who has been involved in open source longer than I have, and whose opinions I respect. On this issue, however, I have to disagree.

This is definitely not the first time CLAs have been in the news. The first time I remember even hearing about them concerned MySQL. The MySQL CLA required a contributor to sign over ownership of any contribution to the project, which many thought was fine when they were independent, but started to raise some concerns when they were acquired by Sun and then Oracle. I think this latest resurgence is the result of Elastic deciding to change their license from an open source one to something more “open source adjacent”. This has caused a number of people take exception to this (note: link contains strong language).

As someone who doesn’t write much code, I think deciding to sign a CLA is up to the individual and may change from project to project. What I wanted to share is a story of why we at OpenNMS have a CLA and how we decided on one to adopt, in the hopes of explaining why a CLA can be a positive thing. I don’t think it will help with the frustrations some feel when a project changes the license out from under them, but I’m hoping it will shed some light on our reasons and thought processes.

OpenNMS was started in 1999 and I didn’t get involved until 2001 when I started work at Oculan, the commercial company behind the project. Oculan built a monitoring appliance based on OpenNMS, so while OpenNMS was offered under the GPLv2, the rest of their product had a proprietary license. They were able to do this because they owned 100% of the copyright to OpenNMS. In 2002 Oculan decided to no longer work on the project, and I was able to become the maintainer. Note that this didn’t mean that I “owned” the OpenNMS copyright. Oculan still owned the copyright but due to the terms of the license I (as well as anyone else) was free to make derivative works as long as those works adhered to the license. While the project owned the copyright to all the changes made since I took it over, there was no one copyright holder for the project as a whole.

This is fine, right? It’s open source and so everything is awesome.

Fast forward several years and we became aware of a company, funded by VCs out of Silicon Valley, that was using OpenNMS in violation of the license as a base on which to build a proprietary software application.

I can’t really express how powerless we felt about this. At the time there were, I think, five people working full time on OpenNMS. The other company had millions in VC money while we were adhering to our business model of “spend less than you earn”. We had almost no money for lawyers, and without the involvement of lawyers this wasn’t going to get resolved. One thing you learn is that while those of us in the open source world care a lot about licenses, the world at large does not. And since OpenNMS was backed by a for-profit company, there was no one to help us but ourselves (there are some limited options for license enforcement available to non-profit organizations).

We did decide to retain the services of a law firm, who immediately warned us how much “discovery” could cost. Discovery is the process of obtaining evidence in a possible lawsuit. This is one way a larger firm can fend off the legal challenges of a smaller firm – simply outspend them. It made use pretty anxious.

Once our law firm contacted the other company, the reply was that if they were using OpenNMS code, they were only using the Oculan code and thus we had no standing to bring a copyright lawsuit against them.

Now we knew this wasn’t true, because the main reason we knew this company was using OpenNMS was that a disgruntled previous employee told us about it. They alleged that this company had told their engineers to follow OpenNMS commits and integrate our changes into their product. But since much of the code was still part of the original Oculan code base, it made our job much more difficult.

One option we had was to get with Oculan and jointly pursue a remedy against this company. The problem was that Oculan went out of business in 2004, and it took us awhile to find out that the intellectual property had ended up Raritan. We were able to work with Raritan once we found this out, but by this time the other company also went out of business, pretty much ending the matter.

As part of our deal with Raritan, OpenNMS was able to purchase the copyright to the OpenNMS code once owned by Oculan, granting Raritan an unlimited license to continue to use the parts of the code they had in their products. It wasn’t cheap and involved both myself and my business partner using the equity in our homes to guarantee a loan to cover the purchase, but for the first time in years most of the OpenNMS copyright was held by one organization.

This process made us think long and hard about managing copyright moving forward. While we didn’t have thousands of contributors like some projects, the number of contributors we did have was non-trivial, and we had no CLA in place. The main question was: if we were going to adopt a CLA, what should it look like? I didn’t like the idea of asking for complete ownership of contributions, as OpenNMS is a platform and while someone might want to contribute, say, a monitor to OpenNMS, they shouldn’t be prevented from contributing a similar monitor to Icinga or Zabbix.

So we asked our our community, and a person named DJ Gregor suggested we adopt the Sun (now Oracle) Contributor Agreement. This agreement introduced the idea of “dual copyright”. Basically, the contributor keeps ownership of their work but grants copyright to the project as well. This was a pretty new idea at the time but seems to be common now. If you look at CLAs for, say, Microsoft and even Elastic, you’ll see similar language, although it is more likely worded as a “copyright grant” or something other than “dual copyright”.

This idea was favorable to our community, so we adopted it as the “OpenNMS Contributor Agreement” (OCA). Now the hard work began. While most of our active contributors were able to sign the OCA, what about the inactive ones? With a project as old as OpenNMS there are a number of people who had been involved in the project but due to either other interests or changing priorities they were no longer active. I remember going through all the contributions in our code base and systematically hunting down every contributor, no matter how small, and asking them to sign the OCA. They all did, which was nice, but it wasn’t an easy task. I can remember the e-mail of one contributor bounced and I finally hunted them down in Ireland via LinkedIn.

Now a lot of the focus of CLAs is around code ownership, but there is a second, often more important part. Most CLAs ask the contributor to affirm that they actually own the changes they are contributing. This may seem trivial, but I think it is important. Sure, a contributor can lie and if it turns out they contributed something they really didn’t own the project is still responsible for dealing with that code, but there are a number of studies that have shown that simply reminding someone about a moral obligation goes a long way to reinforce ethical behavior. When someone decides to sign a CLA with such a clause it will at least make them think about it and reaffirm that their work is their own. If a project doesn’t want to ask for a copyright assignment or grant, they should at least ask for something like this.

While the initial process was pretty manual, currently managing the OCAs is pretty automated. When someone makes a pull request on our Github project, it will check to see if they have signed the OCA and if not, send them to the agreement.

The fact that the copyright was under one organization came in handy when we changed the license. One of my favorite business models for open source software is paid hosting, and I often refer to WordPress as an example. WordPress is dead simple to install, but it does require that you have your own server, understand setting up a database, etc. If you don’t want to do that, you can pay WordPress a fee and they’ll host the product for you. It’s a way to stay pure open source yet generate revenue.

But what happens if you work on an open source project and a much bigger, much better funded company just takes your project and hosts it? I believe one of the issues facing Elastic was that Amazon was monetizing their work and they didn’t like it. Open source software is governed mainly by copyright law and if you don’t distribute a “copy” then copyright doesn’t apply. Many lawyers would claim that if I give you access to open source software via a website or an API then I’m not giving you a copy.

We dealt with this at OpenNMS, and as usual we asked our community for advice. Once again I think it was DJ who suggested we change our license to the Affero GPL (AGPLv3) which specifically extends the requirement to offer access to the code even if you only offer it as a hosted service. We were able to make this change easily because the copyright was held by one entity. Can you imagine if we had to track down every contributor over 15+ years? What if a contributor dies? Does a project have to deal with their estate or do they have to remove the contribution? It’s not easy. If there is no copyright assignment, a CLA should at least include detailed contact information in case the contributor needs to be reached in the future.

Finally, remember that open source is open source. Don’t like the AGPLv3? Well you are free to fork the last OpenNMS GPLv2 release and improve it from there. Don’t like what Elastic did with their license? Feel free to fork it.

You might have detected a theme here. We relied heavily on our community in making these decisions. The OpenNMS Group, as stewards of the OpenNMS Project, takes seriously the responsibilities to preserve the open source nature of OpenNMS, and I like to think that has earned us some trust. Having a CLA in place addresses some real business needs, and while I can understand people feeling betrayed at the actions of some companies, ultimately the choice is yours as to whether or not the benefits of being involved in a particular project outweigh the requirement to sign a contributor agreement.

#OSMC 2018 – Day 1

The 2018 Open Source Monitoring Conference officially got started on Tuesday. This was my fifth OSMC (based on the number of stars on my badge), although I am happy to have been at the very first OSMC conference with that name.

As usual our host and Master of Ceremonies Bernd Erk started off the festivities.

OSMC 2018 Welcome

This year there were three tracks of talks. Usually there are two, and I’m not sure how I feel about more tracks. Recently I have been attending Network Operator Group (NOG) meetings and they are usually one or two days long but only one track. I like that, as I get exposed to things I normally wouldn’t. One of my favorite open source conferences All Things Open has gotten so large that it is unpleasant to navigate the schedule.

In the case of the OSMC, having three tracks was okay, but I still liked the two track format better. One presentation was always in English, although one of the first things Bernd mentioned in his welcome was that Mike Julian was unable to make it for his talk on Wednesday and thus that time slot only had two German language talks.

If they seem interesting I’ll sit in on the German talks, especially if Ronny is there to translate. I am very interested in open source home automation (well, more on the monitoring side than, say, turning lights on and off) so I went to the OpenHAB talk by Marianne Spiller.

OSMC 2018 OpenHAB

I found out that there are mainly two camps in this space: OpenHAB and Home Assistant. The former is in Java which seems to invoke some Java hate, but since I was going to use OpenHAB for our MQTT Hackathon on Thursday I thought I would listen in.

OSMC 2018 Custom MIB

I also went to a talk on using a Python library for instrumenting your own SNMP MIB by Pieter Hollants. We have a drink vending machine that I monitor with OpenNMS. Currently I just output the values to a text file and scrape them via HTTP, but I’d like to propose a formal MIB structure and implement it via SNMP. Pieter’s work looks promising and now I just have to find time to play with it.

Just after lunch I got a call that my luggage had arrived at the hotel. Just in time because otherwise I was going to have to do my talk in the Icinga shirt Bernd gave me. Can’t have that (grin).

My talk was lightly attended, but the people who did come seemed to enjoy it. It was one of the better presentations I’ve created lately, and the first comment was that the talk was much better than the title suggested. I was trying to be funny when I used “OpenNMS Geschäftsbericht” (OpenNMS Annual Report) in my submission. It’s funny because I speak very little German, although it was accurate since I was there to present on all of the cool stuff that has happened with OpenNMS in the past year. It was recorded so I’ll post a link once the videos are available.

In contrast, Bernd’s talk on the current state of Icinga was standing room only.

OSMC 2018 State of Icinga

The OSMC has its roots in Nagios and its fork Icinga, and most people who come to the OSMC are there for Icinga information. It is easy to why this talk was so popular (even though it was basically “Icinga Geschäftsbericht” – sniff). The cool demo was an integration Bernd did using IBM’s Node-RED, Telegram and an Apple Watch, but unfortunately it didn’t work. I’m hoping we can work up an Apple Watch/OpenNMS integration by next year’s conference (should be possible to add hooks to the Watch from the iOS version of Compass).

The evening event was held at a place called Loftwerk. It was some distance from the conference so a number of buses were chartered to take us there. It was fun if a bit loud.

OSMC 2018 Loftwerk

OSMC celebrations are known to last into the night. The bar across the street from the conference hotel (which I believe has changed hands at least three times in the lifetime of the OSMC) becomes “Checkpoint Jenny” once the main party ends and can go on until nearly dawn, which is why I like to speak on the first day.

#OSMC 2018 – Day 0: Prometheus Training

To most people, monitoring is not exciting, but it seems lately that the most exciting thing in monitoring is the Prometheus project. As a project endorsed by the Cloud Native Computing Foundation, Prometheus is getting a lot of attention, especially in the realm of cloud applications and things like monitoring Kubernetes.

At this year’s Open Source Monitoring Conference they offered a one day training course, so I decided to take it to see what all the fuss was about. I apologize in advance that a lot of this post will be comparing Prometheus to OpenNMS, but in case you haven’t guessed I’m biased (and a bit jealous of all the attention Prometheus is getting).

The class was taught by Julien Pivotto who is both a Prometheus user and a decent instructor. The environment consisted of 15 students with laptops set up on a private network to give us something to monitor.

Prometheus is written in Go (I’m never sure if I should call it “Go” or if I need to say “Golang”) which makes it compact and fast. We installed it on our systems by downloading a tarball and simply executing the application.

Like most applications written in the last decade, the user interface is accessed via a browser. The first thing you notice is that the UI is incredibly minimal. At OpenNMS we get a lot of criticism of our UI, but the Prometheus interface is one step above the Google home page. The main use of the web page is for querying collected metrics, and a lot of the configuration is done by editing YAML files from the command line.

Once Prometheus was installed and running, the first thing we looked at was monitoring Prometheus itself. There is no real magic here. Metrics are exposed via a web page that simply lists the variables available and their values. The application will collect all of the values it finds and store them in a time series database called simply the TSDB.

The idea of exposing metrics on a web page is not new. Over a decade ago we at OpenNMS were approached by a company that wanted us to help them create an SNMP agent for their application. We asked them why they needed SNMP and found they just wanted to expose various metrics about their app to monitor its performance. Since it ran on Linux system with an embedded web server, we suggested that they just write the values to a file, put that in the webroot, and we would use the HTTP Collector to retrieve and store them.

The main difference between that method and Prometheus is that the latter expects the data to be presented in a particular format, whereas the OpenNMS method was more free-form. Prometheus will also collect all values presented without extra configuration, whereas you’ll need to define the values of interest within OpenNMS.

In Prometheus there is no real auto-discovery of devices. You edit a file in which you create a “job”, in our case the job was called “Prometheus”, and then you add “targets” based on IP address and port. As we learned in the class, for each different source of metrics there is usually a custom port. Prometheus stats are on port 9100, node data is exposed on 9090 via the node_exporter, etc. When there is an issue, this can be reflected in the status of the job. For example, if we added all 15 Prometheus instances to the job “Prometheus” and one of them went down, then the job itself would show as degraded.

After we got Prometheus running, we installed Grafana to make it easier to display the metrics that Prometheus was capturing. This is a common practice these days and a good move since more and more people are becoming familiar it. OpenNMS was the first third-party datasource created for Grafana, and the Helm application brings bidirectional functionality for managing OpenNMS alarms and displaying collected data.

After that we explored various “components” for Prometheus. While a number of applications are exposing their data in a format that Prometheus can consume, there are also other components that can be installed, such as the node_exporter which displays server-related metrics and to provide data that isn’t otherwise natively available.

The rest of the class was spent extending the application and playing with various use cases. You can “alertmanager” to trigger various actions based on the status of metrics within the system.

One thing I wish we could have covered was the “push” aspect of Prometheus. Modern monitoring is moving from a “pull” model (i.e. SNMP) to a “push” model where applications simply stream data into the monitoring system. OpenNMS supports this type of monitoring through the telemetryd feature, and it would be interesting to see if we could become a sink for the Prometheus push format.

Overall I enjoyed the class but I fail to see what all the fuss is about. It’s nice that developers are exposing their data via specially formatted web pages, but OpenNMS has had the ability to collect data from web pages for over a decade, and I’m eager to see if I can get the XML/JSON collector to work with the native format of Prometheus. Please don’t hate on me if you really like Prometheus – it is 100% open source and if it works for you then great – but for something to manage your entire network (including physical servers and especially networking equipment like routers and switches) you will probably need to use something else.

[Note: Julien reached out to me and asked that I mention the SNMP_Exporter which is how Prometheus gathers data from devices like routers and switches. It works well for them and they are actively using it.]

CarbonROM Install on Pixel XL (marlin)

I am still playing around with alternate ROMs for Android devices, and I recently came across CarbonROM. I had some issues getting it installed (more due to me than the ROM itself) and so I thought I’d post my steps here.

I was looking for a ROM that focused on stability and security, and Carbon seems to fit the bill.

While I have a lot of experience playing with ROMs, I hadn’t really done it on handsets with “Seamless Update“. In this case there are two “slots”, Slot A and Slot B, and this can cause a challenge when installing a new operating system. This procedure worked for me (with help from Christian Oder via the CarbonROM community on Google+).

  1. Install latest 8.1 Factory Image

    This may not be required, but since I ran into issues I went ahead and installed the latest “oreo” factory image. I had already upgraded the phone to Android 9 (pie) and thought that might have caused the problems I was having, but I don’t think that was the case.

  2. Unlock the bootloader

    This is not meant to be a tutorial installing alternative ROMs, but basically you go to Settings -> System and then locate the build number. Click on that a number of times until you have enabled “developer mode” then go to the developer options and unlock the bootloader and enable the ability to access the device over USB. Then boot into the bootloader and run “fastboot flashing unlock” and follow the prompts on the screen.

  3. Boot to TWRP using image

    In order to install an alternative ROM it helps to have a better Recovery than stock. I really like TWRP and pretty much just followed the instructions. Using the Android Debugger (adb) you boot into the bootloader and run TWRP from an image file.

  4. Install TWRP zip

    Once you are running TWRP, install it into the boot partition from the .zip file. Use “adb push” to put the .zip file on the /sdcard/ partition.

  5. Reboot to Recovery (to make sure TWRP still works)
  6. Factory reset and erase /system

    Go to “Wipe” and do a factory reset, and then “Advanced Wipe” to nuke the system partition.

    You will also want to erase user data at this point. Once I got Carbon to boot it still asked me for a password which I assumed was the one I set up in the original factory install (you have to get into the factory image to unlock the bootloader). I went back and erased all of the user data and that did what I expected, so you might want to do this at this step.

  7. Install Carbon

    Use “adb push” to send the latest Carbon zip file to the /sdcard/. Install using TWRP.

    This is the point where my issues started. The next step is to reboot back into recovery. You have to do this so that the other Slot gets overwritten with the new operating system. However, with the Carbon install TWRP was overwritten and that hung the device when I tried to reboot into recovery, so

  8. Re-install TWRP

    Use “adb push” to load the TWRP .zip file again and install it while you are still in TWRP, then

  9. Reboot to recovery

    This should get Carbon all happy on your device as it will be copied over into the other Slot. If you try to boot into the system before doing this bad things will happen. (grin)

  10. Install GApps (optional)

    Now, if you want Google applications you need to install a GApps package. I like Open GApps and so I installed the “pico” package. One thing I am experimenting with here is seeing if I can use a minimal amount of Google software without giving Google my entire digital life. The pico package includes just enough to run the Google Play Store.

    This is optional, and if you just want to run, say, F-Droid apps, you can skip this step, but note I’ve been told that you can’t add GApps later, so if you want it, install it now.

  11. Reboot into the System

If everything went well, you should see the Carbon boot screen and eventually get dropped into the “Welcome to Android” Google sign up wizard. Follow the prompts (I turn off almost everything but location services) and then you should be running CarbonROM with a minimal amount of Google-ness.

The first thing I tried out was “Pokémon Go“. Due to people cheating by spoofing their GPS coordinates, Pokémon Go leverages features of Android to detect if people are running an altered operating system. I’ve found that on some ROMs the application will not work. It worked fine on Carbon and so I’m hoping I can add just a few more “Google” things, like Maps, and then use F-Droid for everything else.

Note that I didn’t “root” my operating system. When you boot into TWRP you can access the entire device with root privileges so I never feel the need to have root while I’m running the device. Seems to be a good security practice and it also allows me to still run Pokémon Go.

Many thanks to the CarbonROM team for working on this. I’m eager to see how soon security updates are released as well as what they do with Android 9, but it looks promising.

The Technology Choice Struggles of a Freetard

TL;DR: With the demise of CopperheadOS, I’ve had to struggle to find a new mobile operating system. With the choices coming down to Google or Apple, I decided to return to Apple and I bought an iPhone. Learning quickly that it is very hard to manage the iPhone under Linux, I also decided to switch to a Macbook Pro. A month later and after a business trip with the laptop, I am returning to Linux as my primary operating system.

This is a rather long post that I doubt will interest even one of my three readers, but as I expect a small subset of the population agonizes over technology choices as much as I do, perhaps someone will find it useful.

Back in 2011 I decided to stop using Apple gear and switch to running as much free software as possible. It was difficult, but I managed to switch almost all of my technology to open, if not always free, options. The hardest part was mobile.

For years people have been trumpeting each new year as “The Year of the Linux Desktop“. The problem is that more and more people are doing without a desktop entirely, and instead interact via mobile devices, so it is becoming more like “The Year of the Free Buggy Whip”. The broader free and open source community totally missed the boat when it came to mobile.

Seriously, where is the “Linux” of mobile? We don’t have it. Our choices are pretty much limited to Apple and Google.

Apple is pretty straightforward. They control the whole experience so you buy devices from them and you are allowed to run the software they let you. The freetard in me chafes at these limitations.

So that leaves Android. The problem with Android is that it is pretty much Google. Almost all of the Android Open Source Project (AOSP) derivatives rely on Google for both security updates and device drivers (which are rarely open). They start from a platform over which they have little control, unlike Linux.

Google is becoming more and more intrusive when it comes to surveillance. When you first sign in you are asked “Do you want to improve your Android experience?” Well, who doesn’t, but what I failed to realize is that if you turn that on (it is on by default) you end up sending pretty much every thing you do to Google: every app you open and how long you use it, every phone call you take, every text you send in addition to every link you visit. Turn it off and then your experience is greatly limited. For example, Google Maps won’t store your recent searches unless that feature is turned on. Recently I was in a private Google Hangout when the other person pasted a link. Although the link showed up normally in the chat window, the URL itself first went through Google when you clicked in it. Seriously? Google needs to track your activity down to the level of a link in a private Hangout?

But, Android is open source, unlike iOS, so for years I focused my mobile platform on Android but using alternative versions, often called “custom ROMs”.

Running custom ROMs is not for the faint of heart. Probably the most famous was CyanogenMod, but unfortunately that organization imploded spectacularly (but lives on in LineageOS). While I originally ran CyanogenMod, I found a really nice solution and community in OmniROM. In addition to the O/S, you need to install Google applications (GApps) separately, and projects like Open GApps let you control exactly what you install. I really liked that, and it worked well for awhile.

But there are two main issues with custom ROMs. The first is that almost all of them are volunteer organizations, thus the attention level of any one maintainer can vary greatly. They don’t have huge test organizations and the number of handsets supported can be limited. Find a good ROM with an active maintainer for your handset and you’re golden, but you can be up for a world of disappointment if not.

The second is that Google is getting more and more aggressive about having their applications run on these operating systems. Certain apps won’t run well (or run at all) if the underlying operating system isn’t “Google Approved”.

Thus I started running into problems. All of my older handsets are no longer being maintained (farewell Nexus 6) and OmniROM doesn’t support the Pixel (sailfish) or Pixel XL (marlin) which were released two years ago, so that option is out for me. I also like to play games like Pokémon Go, but it started behaving badly (or not running) on devices that weren’t vanilla Google.

I thought I had found a solution in CopperheadOS. This is (was) an organization out of Canada that made an extremely hardened version of Android. Unlike most custom ROMs where you replace the recovery partition or enable root access, Copperhead took the opposite approach and provided a very locked down, security conscious operating system. You would think this would be in opposition to free software, but it turns out their default software repository was F-Droid, which only features open source software, and in fact it was impossible to run the Google Play Store on the device (you allow Google the right to install any software they want without explicit permission when you use GApps and this went against the Copperhead philosophy).

This appealed to me, so I decided to try it out. I found I could do over 90% of what I needed to do without Google, and for things like Pokémon Go, I just got a second phone running stock Google (with a lot of the surveillance features turned off). So, my personal information lived on my Copperhead phone, and my “toy” phone let me do things like use Google Maps and call a Lyft.

Carrying two handsets wasn’t optimal, but I got used to it, and I found myself using the “Google” phone less and less. I loved the fact that security updates often hit my Copperhead phone a day or two before my Google phone, and I slept soundly knowing that my personal data was about as secure as I could make it (and still actually use a mobile device).

Then came June and the apparent demise of Copperhead (thanks Bryan Lunduke, for telling me about this and ruining my life, again). I needed to find another mobile solution.

About this time, privacy had come to the forefront with the impending implementation of the GDPR in Europe. The amount and level of surveillance being done by Google became even more transparent. There was a high profile study done in Norway that showed not only were companies like Google impacting your privacy, they were being pretty sneaky about it. The study also called out Facebook and Microsoft.

Surprisingly absent from that article was Apple. In fact, the news out of Apple-land was pretty positive. Due to the GDPR Apple made it possible for European users to download all of the tracking data Apple had on a given user and it was rather minuscule. Since Apple makes money on hardware, its business model makes it much more privacy friendly, even if it isn’t exactly a freetard’s best friend.

So I bought an iPhone.

A lot had changed in seven years. The iPhone is much more powerful but it is also a lot less intuitive. Even now I prefer the Android interface to iOS, but I didn’t find the transition too difficult.

No, the difficult part was trying to use the iPhone with Linux. While I found ways to mount the iPhone to my Linux desktop, you can’t manage music without iTunes, and iTunes doesn’t run natively on Linux.

(sigh)

Well, in for a penny, in for a pound. We had a spare 2017 13-inch Macbook Pro at the office, so I conscripted it to be my new laptop/desktop. Remember that the last Apple O/S I used regularly was Snow Leopard, so there was a second learning curve to climb.

Part of it was real easy. Free software on OSX has come a long way, so I simply installed Thunderbird, moved my profile over, and I was in business for e-mail. Similarly, Firefox was up and running with an install and a sync. The wonderful Homebrew project brought most of the rest of the stuff I needed to OSX land.

But I wasn’t super happy with the interface. I’ve tried a large number of desktop environments, and for my needs Cinnamon on Linux Mint works best. Little things about the OSX desktop just seemed to get in the way.

For example, I use a little tool called “onmsblink” that takes a ThingM blink1 USB dongle and changes its color based on the highest current alarm in my OpenNMS system. I launch it from the command line, but because it is Java it shows up in the dock and I can’t make it go away. Also, I’m used to clicking on an icon, say the Finder, and having a new window pop up. In OSX, it brings all open windows to the front, even if it is in another workspace. Is this “wrong” behavior? I don’t think so, but it is different for me and it interrupts my workflow.

Speaking of different, I’m also stuck with using a number of apps where I used to use one. I use the tool gscan2pdf constantly to scan in paper so I can shred and dispose of it. I have two scanners, a Brother ADS-3000N with the document feeder (works amazingly well under Linux) and a Canon LiDE 210 flatbed scanner. On OSX I ended up loading in two separate vendor-supplied applications to use them, and both of them feel really cluttered.

Plus, you would think an ecosystem like iOS would have a real mail client. One of the best mobile apps ever is K9 Mail, and I really miss it. I finally settled on Altamail, which has a yearly subscription but it was the only app that would easily handle nested folders. For example, I have a Customer folder with over 3000 subfolders. I can’t be scrolling through that on a mobile device. I don’t like it all that much, but it is the only option I could find.

Then there’s iTunes. Man, I used to think iTunes was a pig and now it is much, much worse. It took me longer than I would expect to get back to the interface I wanted (specifically, Songs with Browser View enabled). And, since I was playing around with a number of iTunes libraries, I ended up having to wipe the music off of my iPhone a couple of times since Apple won’t let you sync one devices to more than one library.

There are some good things about iTunes, I specifically like the way you can sync playlists, but I’ve been happier with my free music managers.

One app I really do like on OSX is iMessage. I am not a good typist on mobile devices, and being able to send and respond to a text from the desktop is awesome. And nobody comes close to making a trackpad that works as well as those on Apple laptops.

And thus I became an Apple laptop guy. Before I used two desktops, pretty much identical, with one at home and one at the office, with my laptop reserved for trips. Now I had to make sure I brought my laptop between both places (no laptop “drive of shame” so far). It was nice to have all of my information in one place, but the downside is that I did have all of my information in one place and it made the possible loss of my laptop that much worse.

I had resigned myself to being an Apple guy from here on out, but then I went on a business trip to Seattle where I used the laptop for several days and it was then I decided that I just couldn’t continue to use it.

The main issue that soured me was the keyboard. This was a 2017 model with one of those fancy “touch bar” thingies. Now everyone thinks that Apple is a great innovator, and in many cases they are, but the touch bar is something other companies have tried and discarded. I returned a Lenovo X1 Carbon laptop back in early 2014 that had one and they removed the feature from future editions. I use that top row of keys. I like having an escape key I can feel, and having real function keys is useful for things like games. Plus it is a lot easier to change the volume with an “up” or “down” key versus having to click on the volume icon and then use a slider.

But that wasn’t a deal breaker. When the “2” key started sticking, sometimes printing a character, sometimes printing many characters with one key press, and finally often not printing anything at all, I got discourage, nay depressed.

The issues with this generation of Apple keyboards are well known, but as I rarely use the keyboard on the laptop itself (I’m almost always connected to an external monitor and keyboard) I couldn’t believe it would get dirty enough to exhibit the issue that fast. Plus, the keyboard even when working just isn’t that good. I really miss the keyboard I had on my Powerbook.

This weekend when I got back home I decided to go back to Linux. I dragged my desktop out of the closet, booted it up, and decided to bring it up to date. During my hiatus a new version of Mint had been released, Mint 19, so I upgraded.

Man, that is one beautiful desktop. Seriously, I can’t remember using a nicer looking desktop environment on any platform. The tweaks the Mint team has made to Cinnamon have moved it from great to outstanding.

Please note that this is from my perspective. If you aren’t using Mint that doesn’t mean you suck or that your choices are wrong. The one thing I love most about the Linux desktop is that there exists a flavor for almost every taste and need.

It was as easy to move back to Mint from OSX as it was to move from it in the first place, so it has only cost me a few hours of time mainly waiting for the upgrade to download on my slow connection at home. I also installed a fresh copy on my fifth generation Dell XPS 13 and was pleasantly surprised at how much better the new trackpad driver, libinput works. That was the main complaint I had about my Linux laptop, and I’m eager to try it out when I am next on the road.

Moving back to Linux made me question my mobile O/S choice one more time. Searching around it looks like it is currently possible to run Pokémon Go on a custom ROM as long as it is not rooted, so I downloaded TWRP and LineageOS for my Pixel XL, as well as the “pico” version of Open GApps. I was thinking I could get back to, basically, my Copperhead environment with a minimal amount of Google and be happy.

Lineage Install Error

Bam, right out the door my phone started screaming about the phone driver not working. The memory of issues I experienced running alternative ROMs came flooding back, and I simply restored the Pixel to factory and decided to stay with my iPhone.

I feel much happier that I’ve gone back to Linux, at least part of the way. It should make it easier to go free on mobile as soon as the technology catches up. I’m very eagerly following the work of the /e/ foundation but as of yet they haven’t released any code. Plus it looks like they are going for an all-out Google replacement. I’m pretty happy running my own mail server and Nextcloud instances, so I’m more interested in a secure mobile device that can run apps from F-Droid versus a whole ecosystem replacement. Purism is also coming out with a phone. I really like the philosophy behind that company, but I’ve been stung by enough Kickstarters that I’m taking a wait and see attitude.

The problem with free and open source mobile will be the apps. As I mentioned, I was able to do 90% of what I needed using F-Droid, which bodes well for the /e/ solution but not so much for the Purism one, and both will faces challenges with adoption.

Until then, feel free to Facetime me and check out my growing collection of chins.