SCaLE 13x – February 2015

We are three weeks away from the Southern California Linux Expo and I am getting really excited about it.

For those of you who are in to OpenNMS then tune in that day because we are making a pretty significant announcement at the show. Be sure to come buy the booth on the expo floor and say “hi” to the team, and both Jeff and I will be speaking (although at least during my talk you probably have better things to go see. For example, have you met our Lord and Savior, Docker?)

We are also incredibly excited that MC Frontalot will be performing. I’m not sure of the exact details but I believe it will be Saturday night.

(Note: I stole that picture from here since I like the fact that he has hair in it, well for certain values of “hair”, and note that link may not be safe for work [nudity])

If you are unfamiliar with his work, be sure to check out his YooToob Channel, and if you are so inclined I strongly recommend reading this well written bit (on Jezebel no less) concerning an issue surrounding a Penny Arcade comic a few years ago that really showcases the type of guy he is. Again, might not be safe for work (language). Be sure to click on the link to the original post for more detail.

If you are still on the fence about SCaLE, perhaps this little nugget will sway you: use Promo Code “ONMS” and get 40% off show registration. It’s cheap at twice the price and one of my favorite events of any year, but we want it to be extra special for 2015.

Welcome to OpenNMS 15

Today OpenNMS 15 was released. It was a year and a half between the release of OpenNMS 1.12 and OpenNMS 14, but only three months between OpenNMS 14 and OpenNMS 15.

As we move forward this year we are trying to adhere more to the open source mantra of “release early, release often”, and thus the new major release. There have been 1177 new commits since 14.0.3

You’ll also notice that this version of OpenNMS has a new name – Horizon. We’ve always thought that OpenNMS represents the best network management platform available and the name is meant to reflect that. We hope to make as many improvements we can, as fast as we can, without sacrificing quality, thus keeping OpenNMS out on the “horizon” from the competition.

The main improvement for the 15 release is in the webUI. Although you might not notice it at first, we’ve spent months migrating the whole interface to a technology called Bootstrap. The Bootstrap framework allows us to create a responsive UI that should look fine on a computer, a tablet or a phone. This should allow us a lot more freedom to modify the style sheet and we hope to be able to add “skinable” theme options soon.

A cool feature that can be found in this new UI is the ability to automatically resize resource graphs. If you have a particular set of resource graphs displayed:

and then you shrink the window, you’ll note that the menu turns into a dropdown and the graphs themselves now fit the more narrow window:

There are a number of bug fixes and other new features, and a complete list can be found at the bottom of this post or in our Jira instance (but for some reason you have to be logged in to see it). I am happy to say that there was no need for major security fixes in this release. (grin)

Sub-task

  • [NMS-6642] – CiscoPingMibMonitor
  • [NMS-6674] – NetScalerGroupHealthMonitor
  • [NMS-7060] – merge DocuMerge branch into develop branch
  • [NMS-7086] – alter documentation deploy step in bamboo to match the new structure
  • [NMS-7164] – Fix fortinet event typos (fortinet vs fortimail)
  • [NMS-7238] – Fix UEI names for CitrixNetScaler trap events
  • [NMS-7264] – Document CORS Support

Bug

  • [NMS-1956] – Missing localised time in web pages
  • [NMS-2358] – Time to load Path Outages page grows with each entry added
  • [NMS-2580] – Null/blank sysName value causes null/blank node label
  • [NMS-3033] – Create a HibernateEventWriter to replace JdbcEventWriter
  • [NMS-3207] – Able to get to non authorised devices via path outages link.
  • [NMS-3615] – Custom Resource Performance Reports not available
  • [NMS-3847] – jdbcEventWriter: Failed to convert time to Timestamp
  • [NMS-4009] – wrong content type in rss.jsp
  • [NMS-4246] – Paging arrows invisible with firefox on mac
  • [NMS-4493] – Notification WebUI has issues
  • [NMS-4528] – Time format on Event webpage is different that on Notices webpage
  • [NMS-5057] – Installer database upgrade script (install -d) scans every RRD directory, bombs with "too many open files"
  • [NMS-5427] – RSS feeds are not valid
  • [NMS-5618] – notifications list breadcrumbs differs from notifications index page
  • [NMS-5858] – Resource Graphs No Longer Centered
  • [NMS-6022] – Vaadin Header not consistent with JSP Header
  • [NMS-6042] – Empty Notification search bug
  • [NMS-6472] – Map Menu is not listing all maps
  • [NMS-6529] – Web UI shows not the correct Java version
  • [NMS-6613] – Problems installing "Testing" on Ubuntu 14.04
  • [NMS-6826] – Queued Ops Pending default graph needs rename
  • [NMS-6827] – Many graph definitions in snmp-graph.properties have line continuation slashes
  • [NMS-6894] – New Focal Point Topology UI (STUI-2) very slow
  • [NMS-6917] – Node page availability graph isn't "(last 24 hours)"
  • [NMS-6924] – WMI collector does not support persistence selectors
  • [NMS-6956] – test failure: org.opennms.mock.snmp.LLDPMibTest
  • [NMS-6958] – Requisition list very slow to display
  • [NMS-6967] – GeoMap polygons activation doesn't accurately reflect cursor location
  • [NMS-7015] – Navbar in Distributed Map is missing
  • [NMS-7059] – Local interface not displayed correctly in "Cdp Cache Table Links"
  • [NMS-7075] – xss in device snmp settings
  • [NMS-7112] – provision.pl just works if the admin user credentials are used
  • [NMS-7115] – Message Error in DnsMonitor
  • [NMS-7120] – Unable to add graph to KSC report
  • [NMS-7126] – ReST call for outages ends up with 500 status
  • [NMS-7144] – OpenNMS logo doesn't point to the same file
  • [NMS-7149] – footer rendering is weird in opennms docs
  • [NMS-7170] – Add a unit test for NodeLabel.computeLabel()
  • [NMS-7176] – ie9 does not display any 'interfaces' on a switch node – the tabs are blank
  • [NMS-7185] – NullPointerException When Querying offset in ReST Events Endpoint
  • [NMS-7246] – OpenNMS does not eat yellow runts
  • [NMS-7270] – HTTP 500 errors in WebUI after upgrade to 14.0.2
  • [NMS-7277] – WMI changed naming format for wmiLogicalDisk and wmiPhysicalDisk device
  • [NMS-7279] – Enable WMI Opennms Cent OS box
  • [NMS-7287] – Non provisioned switches with multiple VLANs generate an error
  • [NMS-7322] – SNMP configuration shows v1 as default and v2c is set.
  • [NMS-7330] – Include parts of a configuration doesn't work
  • [NMS-7331] – Outage timeline does not show all outages in timeframe
  • [NMS-7332] – Unnecessary and confusing DEBUG entry on poller.log
  • [NMS-7333] – Switches values retrieved incorrectly in the BSF notification strategy
  • [NMS-7335] – QueryManagerDaoImpl crashes in getNodeServices()
  • [NMS-7359] – Acknowledging alarms from the geo-map is not working
  • [NMS-7360] – Add/Edit notifications takes too much time
  • [NMS-7363] – Update Java in OpenNMS yum repos
  • [NMS-7367] – Octectstring not well stored in strings.properties file
  • [NMS-7368] – RrdDao.getLastFetchValue() throws an exception when using RRDtool
  • [NMS-7381] – Authentication defined in XML collector URLs cannot contain some reserved characters, even if escaped.
  • [NMS-7387] – The hardware inventory scanner doesn't recognize PhysicalClass::cpu(12) for entPhysicalClass
  • [NMS-7391] – Crash on path outage JSP after DAO upgrade

Enhancement

  • [NMS-1595] – header should always contain links for all sections
  • [NMS-2233] – No link back to node after manually unmanaging services
  • [NMS-2359] – Group path outages by critical node
  • [NMS-2582] – Search for nodes by sysObjectID in web UI
  • [NMS-2694] – Modify results JSP to render multiple columns
  • [NMS-5079] – Sort the Path Outages by Critical Path Node
  • [NMS-5085] – Default hrStorageUsed disk space relativeChange threshold only alerts on a sudden _increase of free space_, not a decrease of free space
  • [NMS-5133] – Add ability to search for nodes by SNMP values like Location and Contact
  • [NMS-5182] – Upgrade JasperReports 3.7.6 to most recent version
  • [NMS-5448] – Add link to a node's upstream critical path node in the dependent node's web page
  • [NMS-6508] – Event definitions: Fortinet
  • [NMS-6736] – ImapMonitor does not work with nginx
  • [NMS-7123] – Expose SNMP4J 2.x noGetBulk and allowSnmpV2cInV1 capabilities
  • [NMS-7157] – showNodes.jsp should show nodes in alphabetical order
  • [NMS-7166] – Backup Exec UEI contain "http://" in uei
  • [NMS-7205] – Rename link to configure the Ops Board in the Admin section.
  • [NMS-7206] – Remove "JMX Config Generator Web UI ALPHA" from stable
  • [NMS-7228] – Document that user must be in 'rest', 'provision' or 'admin' role for provision.pl to work
  • [NMS-7247] – Add collection of SNMP MIB2 UDP scalar stats
  • [NMS-7261] – CORS Support
  • [NMS-7278] – Improve the speed of the ReST API and Service Layer for the requisitions' repositories.
  • [NMS-7308] – Enforce selecting a single resource for Custom Resource Performance Reports
  • [NMS-7317] – Rearrange Node/Event/Alarm/Outage links on bootstrap UI
  • [NMS-7384] – Add configuration property for protobuf queue size
  • [NMS-7388] – IpInterfaceScan shouldDetect() method should check for empty string in addition to null string

OUCE 2014 Videos Now Available

The dates are now set for the 2015 OpenNMS Users Conference, but if you can’t wait until September you can now relive the 2014 conference through the magic of YouTube.

You can visit the 2014 conference events calendar and if a video is available it will show up under the “Links” section.

Markus Neumann has been working through the videos and doing his best to improve them, but apologies in advance for the quality of some of them. We’ll attempt to record things better in Fulda.

Building an Open Source PVR: Step Three – Electronic Program Guide

The most frustrating thing about this project was getting the Electronic Program Guide (EPG) to work. Unfortunately, it isn’t easy.

This was one of the things that TiVo excels at doing. You are basically paying for a very up to date program guide. They also offered something called a “Season Pass” which would cause all of the episodes of a particular program to be recorded without having to explicitly select them.

When I got my EyeTV system, this part was a snap. They partner with TV Guide to provide the service, and unlike TiVo’s $14.95/month fee it is a yearly fee of $19.95 (with the first year being included with the unit).

Even my Sony Bravia is able to get over the air EPG information, but I wasn’t able to get that to work with OpenELEC.

The actual EPG configuration occurs in the Tvheadend software. You get a screen like this:

There are three main areas of configuration: the “Internal Grabber”, “Over-the-air Grabbers” and “External Interfaces”.

The internal section displayed a cron job but no module options. None of the OTA grabbers seemed to work, and there wasn’t a module for North America. That left the external grabbers.

I started digging around and found that it really isn’t easy to get this running.

One tool that kept coming up was XMLTV. On the frontend configuration for the Tvheadend client in OpenELEC they even have a section on it:

XMLTV is a number of things, such as a format for representing TV listings, but it is mainly a set of tools “to obtain, manipulate, and search TV Listings”. It contains programs that will connect to an external source to gather EPG data.

Unfortunately, OpenELEC doesn’t ship with it. There is a script called “tv_grab_file” which is used to manage the XMLTV data, but not to actually acquire that data.

For me the easiest solution was to install XMLTV via apt on my home Debian server. It comes with a script called tv_grab_na_dd that can be used to fetch the data.

But I still wasn’t done. I needed a data source. It looks like all the cool kids use Schedules Direct. They are a non-profit that promotes open source software and provides, for a fee, access to EPG information. Since they had a free trial I signed up, configured my tv_grab_na_dd script to access their information, and voilà, I had an XML file with what appeared to be useful information.

I placed that in the webroot of my server, and then configured OpenELEC to point to it. Nothing happened. So I copied the file to the OpenELEC server, modified the client to use the “FILE” method (see screenshot above) and nothing happened.

I finally had to uncheck the XMLTV checkbox under “External Interfaces”. When I did that I finally had something under the “Internal Grabbers” section.

The last chore was to associate the channels I had discovered with the program guide.

Prior to getting all of that to work, the drop down for “EPG Source” had been blank.

So, to summarize my steps:

  1. Get an account at schedulesdirect.org
  2. Install the XMLTV tools somewhere (I used a Debian box)
  3. Configure XMLTV to access your Schedules Direct account
  4. Set up a cron job to periodically grab the updated EPG information and store it in a web root:
     0 1,13 * * * /usr/bin/tv_grab_na_dd --config-file ~/xmltv.conf --days 7 > /secure/html/xmltv.xml
    
  5. On the OpenELEC box, set up a cron to fetch the data:
    0 2,14 * * * wget http://172.20.10.12/xmltv.xml -O /storage/xmltv.xml
    

Whew. So far everything has been working well. You want to be sure not to fetch the data too often as that can overwhelm the Schedules Direct servers. My current seven day XML file is about 10MB.

I went ahead and signed up for a year account for $25, bringing my total to $705.92 (the hardware was $680.92 and the software was, yup, $0). It’s quite possible to shave off about $200 by going with less memory and a smaller SSD (or using an HDD) or if you already have a server to run the Tvheadend backend you could get by with a Raspberry Pi.

My next steps are to play with all the cool add-ons and to try and organize my pictures in a fashion where they would be usable with the system. More fun for me.

Building an Open Source PVR: Step Two – Software

So in my quest to replace my Mac-based PVR I wanted something lightweight that could be controlled via a remote. I had issues with my current setup when a keyboard or a mouse just had to be used, and I wanted to avoid that. Since this system would be dedicated to the PVR, I didn’t want to install anything that wasn’t necessary.

This left me two options: Kodi (formerly XBMC) and MythTV. I decided to try out Kodi via the OpenELEC project. OpenELEC aims to create a very lightweight instance of Kodi that can be installed (and probably even run) from a USB stick. Sounded like just want I needed.

The easiest way it install OpenELEC is to create a bootable install USB stick. This is pretty easy, if you read the instructions correctly. I actually spent a lot more time on this than I needed because of a failure to do so. Once you download the image you need (I used the new bundled “generic” version which works with Intel-based devices as well as most others), you insert your USB stick and then run the “create_livestick” command. You pass a parameter to that command which indicates the path to the USB stick, i.e. /dev/sdX where X is the drive letter.

This is where I screwed up. I could easily tell that the stick I used was mounted on /dev/sdh1, so that’s what I used. The problem was by adding the “1” I was specifying a partition and not the whole drive. It took me an embarrassingly long time to figure out what I was doing wrong.

Once the stick was created, I just booted the Intel NUC with it and followed the on-screen instructions. Pretty soon I had a working OpenELEC system.

Now let me stress that OpenELEC is not designed as a dedicated video recorder. It is designed to run Kodi which is a media center, so most of its functions are aimed at managing libraries of media and not recording television. The menu is organized by media type:
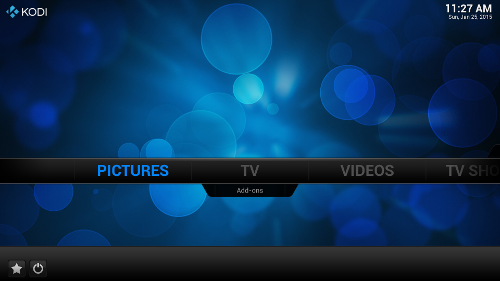
You have a Pictures menu, and if you have the PVR add-ons installed, a TV menu item. Videos are movies, whereas TV Shows are media files that have been identified as TV Shows (different than things you have recorded on your PVR).
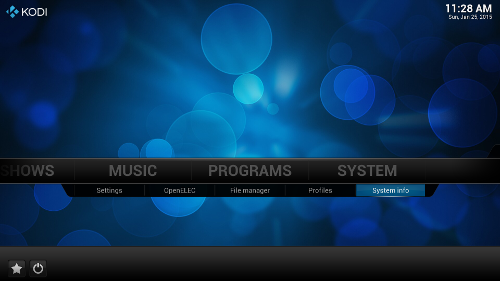
Then you have your Music files, any Programs you have added to the system (as in software programs) and the System menu itself.
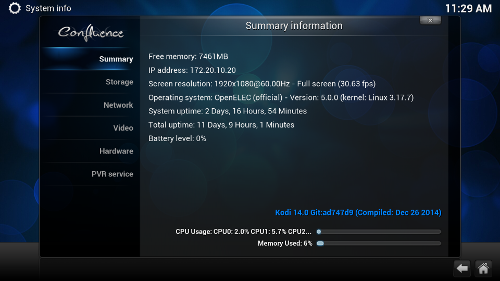
The system information screen gives you a read-only overview of the system, including memory usage and frames per second.

To actually change things you need to go to the configuration menu:
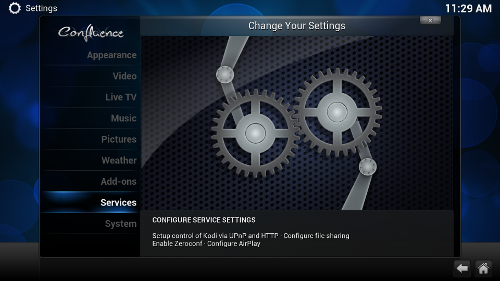
You can add media sources via pretty much every network protocol currently in use. As I have a couple of UPnP servers on my home network I used that format, but I found that when I added new content the system wouldn’t pick up the changes. So I installed an add-on to update my library but it didn’t help:
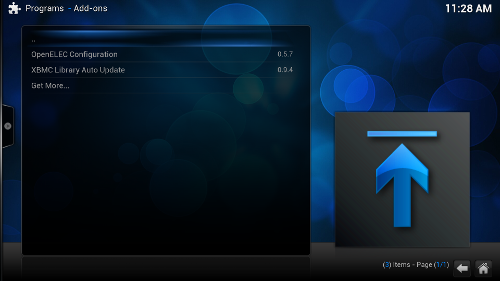
I searched but couldn’t find any way to get the changes to show up. There is a menu that comes up when you hit the left arrow that is supposed to update the library but it wouldn’t work for me. Since my UPnP servers can also serve files over SMB, I tried that and it not only fixed the issue but opened up a whole new level of coolness.

You can scan for TV Shows in your media files, and when you do Kodi will try to “scrape” information off of the Internet for such things as artwork and episode synopsis. You have to have your library named in a particular fashion (which I do) but then it is pretty automatic:
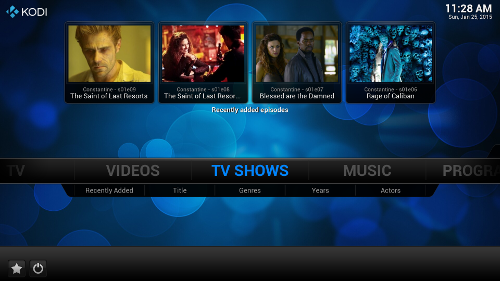
This didn’t happen when I was using UPnP.

This is all well and good, but I still get a lot of content through Over the Air (OTA) television broadcasts and the whole purpose of this exercise was to get that working. In order to add PVR functionality to OpenELEC you need to install add-ons. This usually consists of a “backend” application that does all of the heavy lifting with respect to video capture and encoding, and a “frontend” or client application that connects with the backend and displays the video. I specifically chose more powerful hardware as I wanted both features on the same unit.

First I needed to install the backend, which is a piece of software called “Tvheadend“. It was a little hard to find in the menus as it is a “service” and not a normal add-on, so you have to find the “services” section of the add-ons menu:
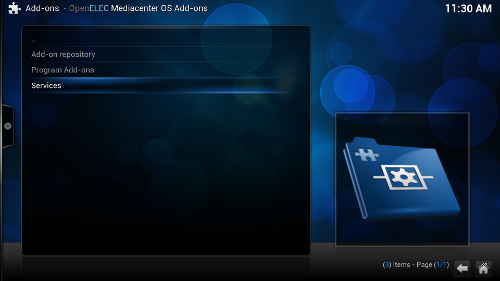
and then you can find and enable your services:

Like most add-ons within Kodi, you will have an “information” screen:
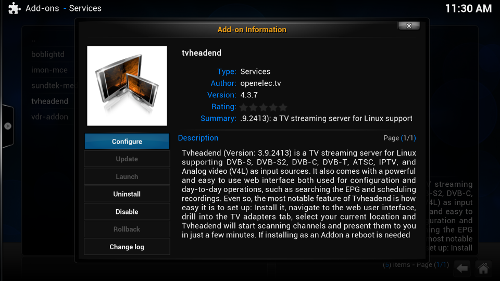
and a configuration screen:
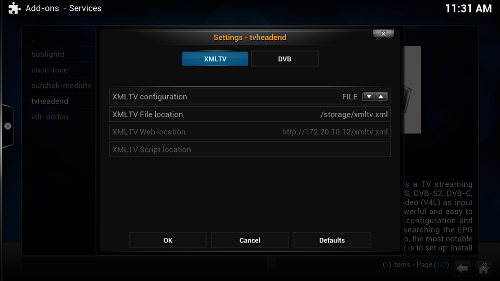
The configuration screen comes into play when you set up the Electronic Program Guide (EPG) but I’ve reserved that for a separate post.

To access the Tvheadend software, you have to browse to it via http://[openelec-server]:9981. That would be a different URL, of course, if you installed it on a server other than the OpenELEC box. This is where it got difficult as most of the documentation on-line is out of date and the menu options have changed. I’ll post what I did in the hope that it might help someone else out.

First, you want to go to the Configuration tab:
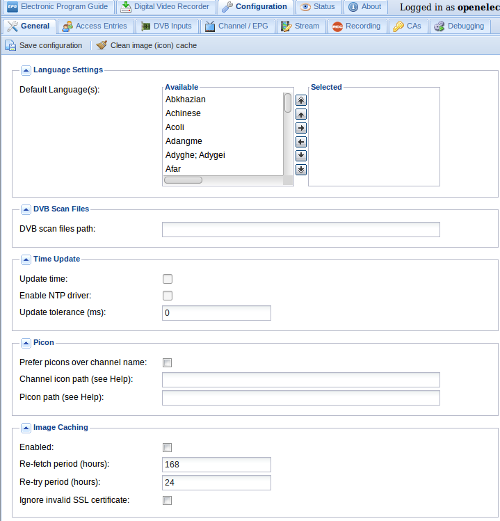
You don’t have to do anything on the “General” tab if you don’t want to, but you do need to see a TV capture device on the “DVB Inputs” tab:

If you have chosen a supported capture unit, it should be displayed here. If not you’ll need to either figure out why it isn’t or get another unit. My Kworld UB435-Q showed up with support for both DVB-C and ATSC formats. Since I am interested in OTA broadcasts in the United States, I chose to enable the ATSC interface as the other is used for cable, which I don’t have.
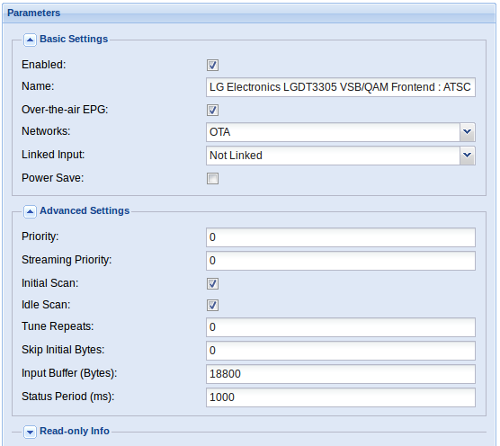
Note in this screenshot that there is a Network entry called “OTA”. This was not there when I first enabled the interface. I had to go and set it up on the “Networks” tab and then add it.

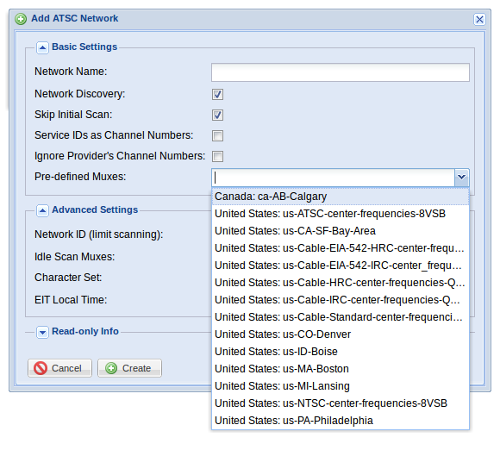
This took me a rather long time to figure out. You need to tell the Network what multiplexers to use, and it looks like you would need to add them individually under the “Muxes” tab. It turns out that there are a number of pre-defined muxes including one for North America ATSC called “United States: us-ATSC-center-frequencies-8VSB” so I just chose that for my “OTA” network:
Once I associated it with my adapter in the “DVB Inputs” tab, I had a list of television channels:
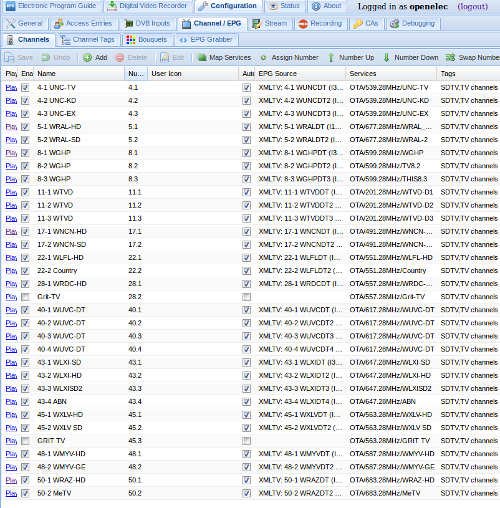
Tvheadend is pretty cool on its own. If you notice on the screenshot there is a “play” button next to the channel name and if you click it you get a stream that will play on your computer. We recently had a bad weather day and I worked from home, and I was able to keep the local news up in a window while I worked. I haven’t really explored all of the features of Tvheadend, but once I got to this point it was time to head back to OpenELEC and set up the frontend client.

Going back to the configuration menu and looking through the Kodi add-ons, there is a section called “PVR Clients”:
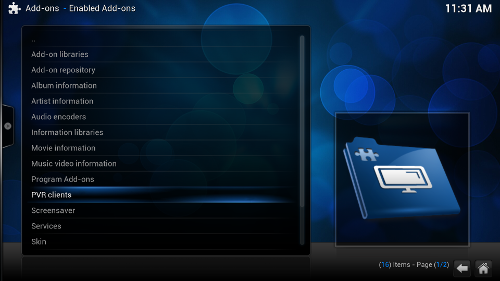
I wanted the Tvheadend HTSP client:
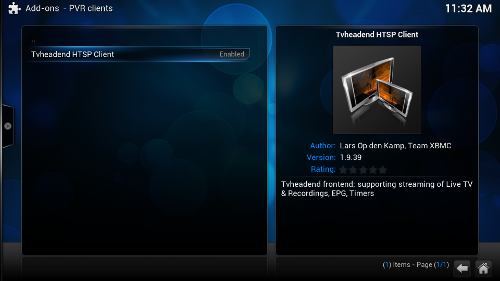
Just like the backend, there is an information screen:
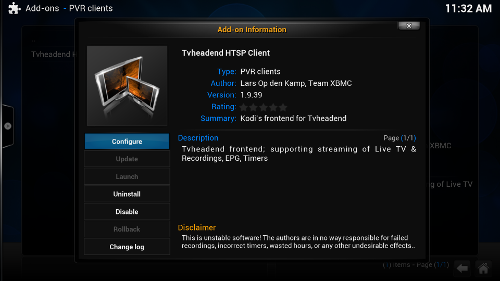
and a configuration screen:
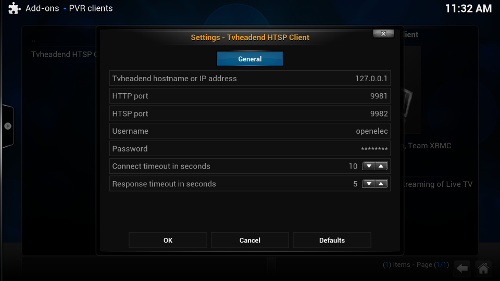
In this configuration screen, you have to point to the Tvheadend backend, which in my case is on localhost.

If you get to this point, then you should see a new “TV” menu item:
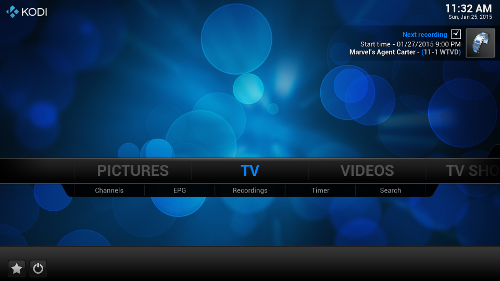
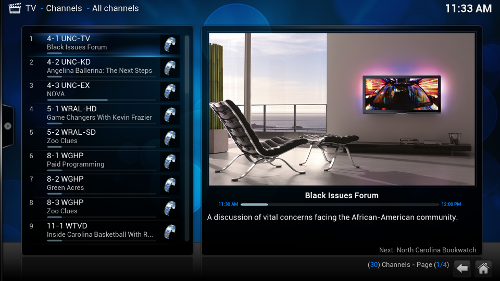
You can watch live TV:
But the main reason I wanted a PVR was to time shift and store TV programs so that I could a) skip the commercials and b) make sure I didn’t miss anything. This requires access to the Electronic Program Guide and I could not figure out how to get it to work. I spend days worth of my limited free time working on this. The forums and the existing documentation were not much help.

I got so frustrated that I based the system and installed Mythbuntu – an Ubuntu-based distribution that focuses on MythTV in the same fashion OpenELEC focuses on Kodi. I figured that since MythTV was designed to be a PVR from the start, it might be easier.

There were a number of differences apparent right away. Mythbuntu is huge compared to OpenELEC. It includes a number of things that just aren’t required. It was, however, easy to install, and building on my newly earned knowledge with OpenELEC I was able to navigate the initial setup easily. I found that the MythTV documentation was slightly better than OpenELEC/Kodi/Tvheadend, but I still hit snags.

The first was that MythTV wouldn’t recognize the Kworld tuner I was using. It did, however, see the EyeTV tuner from my Mac-based install. But using it and having it scan for channels turned up nothing. The channel scan seemed to complete as expected but nothing was discovered.

I spent another day’s worth of free time trying to get that to work, but I gave up pretty easily. I wanted to use the Kworld tuner and possibly sell the EyeTV unit, so it bothered me that it wasn’t recognized. Plus, Mythbuntu just wasn’t the lightweight install I wanted, so I decided to go back to OpenELEC.

I did finally get the EPG working, but I’m going to reserve that story for the third and final post in this series. Once that happened I could see the guide in OpenELEC:
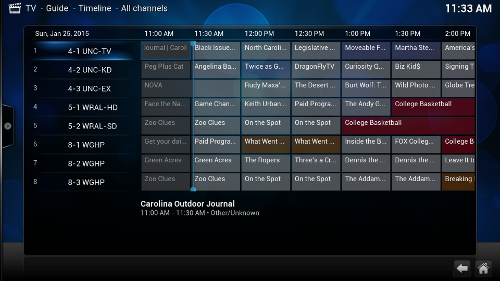
Yay!

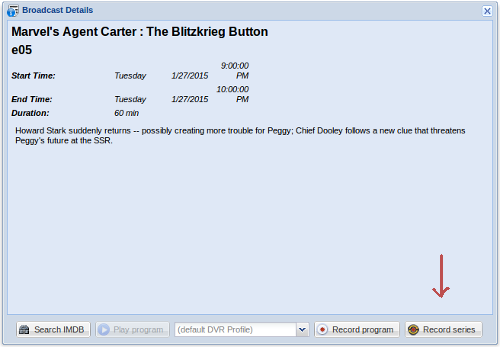
Is it perfect? No. The OpenELEC TV frontend is pretty limited. While I can schedule a show for recording through the EPG by setting a “timer”, I have not found a way through the GUI to record a whole series. I can do it through the Tvheadend web interface by selecting the show in the EPG and choosing “Record Series”:
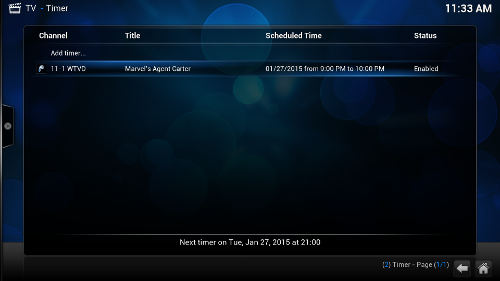
and then it will show up on the “Timers” section of OpenELEC:
You can access saved recordings through the menu as well:
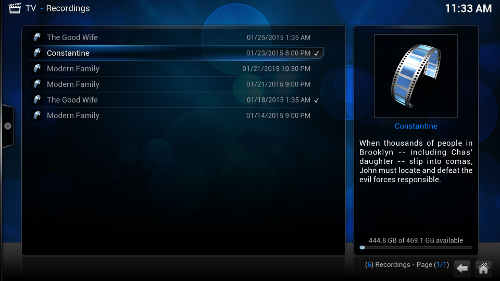
but it frustrates me that there doesn’t seem to be a way to delete the recording once I’ve seen it. I have to do that through the Tvheadend web page.

(sigh)

Overall I’m happy with my new OpenELEC Kodi install. There are a large number of add-ons that I haven’t explored yet, and perhaps I’ll have the time one day. When I was younger and got a new piece of technology I would try out every single feature. Now I tend to do the bare minimum I need to have a viable solution and then stop. (grin)

If you don’t care about OTA television then OpenELEC is a breeze to set up. The only issue I see is that there are a number of closed solutions, such as Google’s Chromecast and Amazon’s FireTV that do pretty much the same thing, at least with respect to video, and they cost about as much as a nice meal versus several hundred dollars.

But I like OTA television. Between it and other services I have like Netflix and Amazon Prime Instant Video, I always have something to watch. Plus, OTA HDTV signals aren’t compressed like those from cable and satellite providers, so the quality is excellent.

This experiment to create an open source PVR both emphasizes the good and the bad about free software. I consider myself pretty technically savvy but I had a lot of issues getting this to work. But I also learned a whole lot about four open source communities (OpenELEC, Kodi, Tvheadend and MythTV) and how OTA television actually works. My PVR is not some magical black box but a tool that I can control and manipulate to my benefit.

Technology is key to personal freedom and ceding the understanding of how it works to third parties can be dangerous. I know it sounds silly to sow fear about something as trivial as the ability to record “The Big Bang Theory“, but rarely does societal change happen in a huge way all at once. It is more a series of small things, chipping away at our freedoms over time, and getting this to work just made me feel like, at least in my life, that I was making a difference.

Many thanks to the people behind OpenELEC, Kodi, Tvheadend and their communities for making this possible.

Building an Open Source PVR: Step One – Hardware

Many years ago I was jealous of my friends that had a TiVo. Since I live out on a farm and get my television the old fashioned way via an antenna, TiVo didn’t work for me. I was stuck with using a VCR to record my television programs.

UPDATE: My friend Tanner pointed out that TiVo does offer an Over the Air (OTA) option now. It runs $49.99 for the hardware plus a monthly charge of $14.99 (a “lifetime” option is available as well). Looks pretty cool and I’m sure it is easier to set up than what I did. If I wasn’t all about open source I would have seriously considered this.

Then I got introduced to a product called EyeTV. This is a product designed for OS X that looks like an old school USB stick with a coax connector at one end. Connect that to your antenna, plug the USB end into your Mac, install the software and, voilà, you have your own personal video recorder (PVR). The hardware is actually a Hauppauge WinTV HVR-980 but the secret sauce is the software to make it easy to use.

Note: it appears they don’t make that unit for the US anymore and instead sell an external unit.

The EyeTV setup works fine, but as I’ve moved away from Apple products I have been wanting to replace it with an open source PVR. There are a number of open source media suites, including Kodi (previously XBMC) and MythTV, and I’ll cover that in my second post. I decided to explore OpenElec, which is a lightweight packaging of Kodi, and since I could not find an “all in one” guide for setting something like this up, I wanted to document the process I went through in the hope that it will help someone else.

The first challenge was finding suitable hardware. I run EyeTV on a Mac Mini. It’s small and quiet and has enough horsepower to drive the EyeTV software at HD resolutions. But, it is a full operating system and has some frustrating issues. First, I use Front Row, which Apple dropped with OS X Lion. Next, it is connected to a UPS and when the power blips (which happens frequently on the farm) I get a little pop up on the screen that requires you to click “ok”, and that can’t be disabled. Almost every time I go to watch a program I have to dig out a wireless mouse just so I can acknowledge the dialog box. I wanted something that could be run entirely by remote and was as lightweight as possible.

Noise from the unit was a big consideration for me. If you want to do a lot of video processing you need a rather powerful machine, but those tend to need cooling and cooling means noise. To deal with this, most PVR software comes with the concept of a “frontend” or playback client that talks to a “backend” that actually acquires and manipulates the video stream. A lot of people have had success in using a Raspberry Pi as the frontend, but I wanted a unit that was both powerful enough to act as both the frontend and backend while not generating much noise.

Yeah, I know, first world problem.

The first unit I tried was the Z3RO Pro from Xi3. My friend Donnie works at WDL Systems and they specialize in embedded devices, so he tends to be pretty up to date on the latest new shiny and recommended I check it out. I ordered one from Amazon preconfigured with an SSD hard drive and 4GB of RAM.

It’s a very stylish and compact unit, and the one I bought came preloaded with SuSE Linux. It did have noticeable fan noise, however. Nothing too obnoxious, but in my quiet office I could definitely hear it.

That wasn’t a show stopper, but what did kill it for me was the fact that I couldn’t get it to talk to any of my HDMI devices. The Z3RO Pro comes with two video ports, one for DisplayPort and a combo DP/HDMI connection. You have to be very careful when putting an HDMI plug into that port as there is nothing to really guide the orientation (you put it in upside down) and if you force it in the wrong way you can damage it. I didn’t have a HDMI cable at the office, so I used an HDMI to DVI one and it worked fine, but when I got home the unit wouldn’t recognize the monitor with a straight HDMI cable. I tried three different cables and three different monitors and not even the boot screen would show up, so I had to return the unit. There is no audio out on the Z3RO Pro outside of HDMI and audio is a big part of this experiment.

The next unit I tried was the Intel NUC (Next Unit of Computing). This looks like a taller, smaller version of the original Mac Mini. It comes as a kit and you have to add your own storage and memory. Since my current setup has a 350GB HDD, I opted for a 512GB SSD and 8GB of Crucial RAM. The NUC also requires a mini-HDMI connection, so I bought a mini-HDMI to HDMI cable as well.

When the unit arrived, there was a cute little Easter Egg upon opening the box:

In addition to the computer hardware, I had to obtain a compatible TV tuner and a remote.

For the tuner I went with a Kworld UB435-Q, which is supported by OpenElec, and an Ortek VRC-1100 for the remote control. I didn’t really care about the remote itself as I have a Harmony 900 universal remote and my plan was to use it, but I needed an IR receiver and the Ortek was cheap.

I did manage to get this setup working well with OpenElec, but it wasn’t easy and I’ll cover the details in the next post. One funny thing I found was when I was programming the Harmony it appears that the NUC includes an IR receiver so the Ortek is unnecessary. You might be able to understand my confusion when the remote was working but the little red LED in the Ortek receiver wasn’t blinking. I ended up unplugging it and when I could still manipulate OpenElec I concluded that the NUC must have it. During this process, however, I ended up blanking my Harmony and I had to reconfigure everything, and at some point the NUC’s IR stopped working. Since I got it working with the Ortek’s receiver and I’m not in any need of extra USB ports, I kept it.

The cost of this experiment so far:

Intel NUC BOXD54250WYKH1 $351.00
Crucial MX100 512GB SATA 2.5″ SSD $213.99
Crucial 8GB Kit (4GBx2) DDR3 1600 $66.99
Kworld UB435-Q USB ATSC TV Tuner $24.99
Ortek Windows 7 Vista XP Media Center MCE PC Remote Control $16.96
AmazonBasics High-Speed A to C Type, HDMI to Mini-HDMI Cable $6.99
Total: $680.92

You can shave $100 to $150 off of that price by using a smaller SSD. The Intel NUC I bought also supports laptop-size HDDs, but if you plan to use an SSD and just want a smaller unit, there is an SSD-only version of the NUC that is a little smaller and a couple of dollars cheaper.

This is much more expensive than a lot of media players out there, and the main cost has to do with my requirement to capture live over-the-air digital television. For many people, this is an archaic concept (I was talking about this in the office and Ben jokingly asked “What’s a channel?”) and thus of limited value, but for those of us still using the old paradigm a PVR like this is useful.

Finally, while my NUC is based on Intel’s Haswell chip, they just announced that the Broadwell-based units will ship soon. In an ironic twist, they are being manufactured via a partnership with Xi3. As soon as that happens, you can expect the price of my unit to drop, so if you are considering a project like this, you have options.

And that’s what open source is all about to me: options.

Zabbix and OpenNMS

The network management application space is rather cluttered, with a number of “fauxpensource” offerings that can really confuse the landscape when people are looking for truly open solutions.

Two exceptions to that are OpenNMS (‘natch) and Zabbix.

According to the Wikipedia article, Zabbix was started in 1998, which makes it a little older than OpenNMS, which I’m told was started in July of 1999 although we use March 29th, 2000, as the official “birth date” since that’s when the project was registered on Sourceforge.

Despite being in the same space and about the same age, I’d never really used Zabbix or interacted with their community until 2009 when I met Rihards Olups.

Rihards is kind of “the Mouth of Zabbix” and I met him at the 2009 Open Source Monitoring Conference where he brought me some gifts from his home in Lativa. He repeated the gesture at this year’s OSMC, and I asked when would be his next trip to the US so I could return the favor. He pulled out his handy and said “Are you anywhere near Raleigh, North Carolina?”

Since that happens to be pretty much my home I was happy to find out that he was coming to town. Even though he was sick with the flu that had been going around, we managed to get a gang together for dinner.

Left to right, that’s Rihards (with the awesome beard), Eric (who was in town from Texas), Sarah, Seth, David, Me, and Ben.

We went to The Pit, which is an acceptable, local barbecue restaurant that is much more “presentable” than some of my favorite dives although the food isn’t quite as good, and then afterward we went next door to the “barcade” and played games.

I played pinball (one of my favorite things to do) and Rihards played his first game on a real pinball machine. Yes, I’m a bit older than him.

One of the things I like about my job is that I can go most anyplace and find like-minded free software people. It’s awesome and I always have a good time. I hope to visit Riga in September around the time of the OpenNMS Users Conference and meet more.

Important Security Issue with OpenNMS

It is said that “given enough eyeballs, all bugs are shallow”, which is true, but the tricky part is finding enough eyeballs, especially useful ones and not the ones in that jar in Blade Runner.

Recently, an end user reported a rather severe security issue with OpenNMS.

The process that serves up the “Categories” section on the front page of the web interface is called RTC (for Real Time Console). The database queries that create the availability numbers on that page can be expensive in terms of resources, so the RTC daemon was created to periodically query the database and then cache the results so that lots of users wouldn’t create an undo load on the system.

We use a tool called Castor to process XML data within OpenNMS. Due to a bug in Castor, if Castor discovers an error when processing an XML file, it can throw an exception that includes the contents of the file.

This is very useful when the files relate to OpenNMS and you are trying to debug them, but you don’t exactly want the contents of /etc/shadow or /etc/passwd displayed indiscriminately. That’s exactly what this exploit allows.

Since the default username and password for the RTC user is “rtc” and exists on every system, a malicious person could use that information to obtain the contents of any file on the system. Note that as far as the OpenNMS application is concerned, the RTC user has very limited permissions, but this is caused by an issue with Castor and it has just
enough permissions to trigger it.

This has been reported as our first ever CVE: CVE-2015-0975

The best fix is to upgrade to OpenNMS 14.0.3. If, however, you are unable to upgrade soon, you can edit the Spring security file to limit requests from RTC to just the localhost, which should mitigate most of the issue. Full instructions and files can be found on the wiki.

To summarize, all versions of OpenNMS prior to 14.0.3 contain a bug where *anyone* with access to the webUI (port 8980 on the OpenNMS server) can retrieve any file that is on the system. While this isn’t the end of the world, it definitely could be considered bad and should be addressed.

OUCE 2015 – 28 September to 1 October

Just a quick post to remind folks to reserve the dates for the next OpenNMS Users Conference Europe to be held in Fulda, Germany, the last week in September. It is usually held earlier in the year, but construction on the University of Applied Science campus pushed it out. I am really looking forward to the nicer weather (it snowed the last time we met in Fulda).

Organized and run by the independent OpenNMS Foundation, this is a yearly gathering of OpenNMS users and developers from around the world for several days of training, presentations and camaraderie. It’s a great time and I look forward to it every year.

And yes, there is beer, some of it free.

The Call for Papers is open.

Hope to see you there.